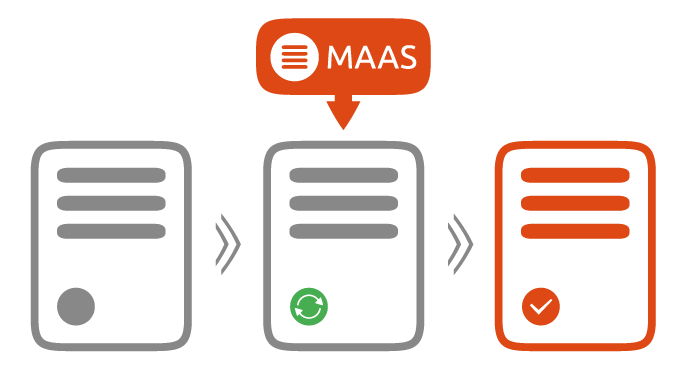
Deploying Azure Stack HCI OS using Canonical MAAS
Automating the Deployment of Azure Stack HCI Series
There are several methods to deploy an Azure Stack HCI OS Image. You can use solutions like System Center Configuration Manager (SCCM/ConfigMgr), Microsoft Deployment Toolkit (MDT), Windows Deployment Services (WDS), or other Infrastructure as Code (IaC) tools like Terraform and Ansible, with the appropriate configurations. Additionally, Canonical offers a solution called MAAS (Metal-As-A-Service).
Throughout my career, I’ve generally preferred Microsoft solutions for deploying Microsoft Operating Systems, favoring tools like MDT and WDS. However, my current company isn’t a Microsoft-centric environment. Instead, they use Terraform and Ansible for IaC, which I’m not very experienced with, but I’m open to learning.
In the upcoming series of blog posts, I’ll document my journey in automating the deployment of Azure Stack HCI OS. I’ll be using Terraform to initiate a MAAS deployment and Ansible to configure the Azure Stack HCI OS, ultimately preparing it for deploying an Azure Stack HCI cluster using Microsoft’s Cloud Deployment.
NOTE: After writing this blog and doing more research around not currently being able to generalize an Azure Stack HCI Image during sysprep, I have put this project on hold. The section “Edit Logon.ps1 Script” explains more about this issue with Azure Stack HCI OS and trying to build an image to deploy. I have left this blog up for now in hopes I will find a fix to this issue.
- What Are The Tools
- The Resources
- The Image Server
- Setting Up
- Create the Image
- Getting Images to MAAS
- Deploying The Image
- Next Up
What Are The Tools
To start, what is MAAS? MAAS, which stands for Metal-As-A-Service, is a tool developed by Canonical that provides server provisioning and self-service, remote installation of operating systems like Windows, CentOS, ESXi, and Ubuntu on both physical and virtual machines. According to their website, MAAS enables you to transform your datacenter into a bare metal cloud.
In this blog, I won’t be focusing on how to deploy or set up MAAS. I assume that MAAS has already been installed and that the environment and necessary tools are in place. Perhaps in the future, when I have a deeper understanding of MAAS, I will write a blog about deploying the solution.
Regarding my environment, I have a MAAS server, another Ubuntu machine configured with the MAAS CLI, and a Windows 2022 Image server running Hyper-V. While I won’t delve into the details of the MAAS server and the Ubuntu server running the MAAS CLI, I will start by focusing on building the image server later in this blog.
The Resources
The following are the resources I used to document this process:
- https://www.cryingcloud.com/blog/2022/10/19/create-azure-stack-hci-images-for-use-with-maas
- https://github.com/cloudbase/windows-imaging-tools
The Image Server
The image server is a virtual machine running on a VMWare cluster located somewhere within one of our datacenters. To be honest, I don’t know the exact location; I simply requested it, it was built, and now I have access to it.
The requirements for the image server are straightforward: a Windows host with Hyper-V enabled, PowerShell, and the Windows Assessment and Deployment Kit (ADK) installed. The Windows host can be either a Windows Server or Windows 11, as long as the necessary tools are installed and Hyper-V can be enabled. This host could be an Azure VM running in Azure, an Azure Arc VM on an Azure Stack HCI cluster, a VMWare VM like the one I’m using, or even a Windows host deployed to bare metal. Just keep in mind that if you are using an Azure VM, ensure it supports nested virtualization.
Configure Image Server
These are the tools and configuration that I use on my image server:
- Enabled Remote Desktop
- Install Windows Assessment and Deployment Kit (ADK)
- Set PowerShell Execution Policy to bypass (if your security team allows this)
- Install Chocolatey (If allowed by security)
- Use Choco to install:
- VSCode
- Git
- Putty
- WinSCP
- Install Hyper-V and Management Tools
- Create an external virtual switch (after reboot)
Enable Remote Desktop
Set-ItemProperty -Path 'HKLM:\System\CurrentControlSet\Control\Terminal Server' -name "fDenyTSConnections" -value 0
Enable-NetFirewallRule -DisplayGroup "Remote Desktop"
Install Windows Assessment and Deployment Kit (ADK)
For my first few attempts I didn’t download and deploy the ADK. This would come in handy when trying to create more advanced unattended.xml files. For more information on how to download and install the ADK you can check the following Microsoft Learn documentation:
https://learn.microsoft.com/en-us/windows-hardware/get-started/adk-install
Set PowerShell Execution Policy
Since this is a lab server I don’t really have an issue to set the policy to bypass. In most cases, these image build servers shouldn’t be in production anyway. If your security team has an issue, there is always an Azure VM just a few clicks away. (Shhhh, I didn’t say that)
Set-ExecutionPolicy -ExecutionPolicy bypass -Force:$true
Install Chocolatey
If you are using Windows Server I recommend Chocolatey, but if you are using Windows 11 for your image machine, WINGET is already installed.
Set-ExecutionPolicy Bypass -Scope Process -Force; [System.Net.ServicePointManager]::SecurityProtocol = [System.Net.ServicePointManager]::SecurityProtocol -bor 3072; iex ((New-Object System.Net.WebClient).DownloadString('https://chocolatey.org/install.ps1'))
Tools Installation
choco install vscode -y
choco install git -y
choco install putty.install -y
choco install winscp -y
Install Hyper-V and Management Tools
Install-WindowsFeature -Name Hyper-V -IncludeManagementTools -Restart
Create External vSwitch
$adapter = Get-NetAdapter | ?{$_.status -eq "up"} | select -first 1
new-vmswitch "External" -NetAdapterName $adapter.name
Setting Up
I do want to shout out to https://www.cryingcloud.com/ and https://github.com/cloudbase/windows-imaging-tools, because most of my success came from using these resources.
Create Folder Structure
Now we create our directory structure. The following PowerShell script will create a root folder called maas followed by subfolders called iso, scripts, source, and images.
mkdir maas
cd maas
mkdir iso
mkdir scripts
mkdir source
mkdir images
Clone Repo
Now we need to clone the repo that we will use when running scripts. The following repo will be cloned, https://github.com/cloudbase/windows-imaging-tools. From the root projectd directory, mine is called maas, run the following PowerShell script:
git clone https://github.com/cloudbase/windows-openstack-imaging-tools.git
cd windows-openstack-imaging-tools
git submodule update --init
Load Modules
Make sure you are in PowerShell as an Administrator session. Then run the following script to load the modules needed:
pushd windows-openstack-imaging-tools
Import-Module .\WinImageBuilder.psm1
Import-Module .\Config.psm1
Import-Module .\UnattendResources\ini.psm1
Create Config.ini file
We are going to create an empty configuration file. Run the following PowerShell command:
$ConfigFilePath = ".\config.ini"
New-WindowsImageConfig -ConfigFilePath $ConfigFilePath
Download Azure Stack HCI ISO
You will need an Azure Subscription and an account with access to that subscription to download the most recent Azure Stack HCI ISO. The following Microsoft Learn documentation will guide you through obtaining the ISO:
Download Azure Stack HCI Software
Once downloaded, place the ISO in the ./maas/iso directory.
As mentioned in the CryingCloud blog, if you want to customize the image using the “Windows System Image Manager” to build custom unattended files, you will also need to extract the Azure Stack HCI ISO to your ./maas/source directory. The simplest method is to mount the ISO, then copy and paste all the contents into a folder within the ./maas/source directory, which you can name hci or something similar.
At this point, you are ready to start customizing your configuration files, building your scripts, and creating your image.
Create the Image
Edit Config.ini File
The config.ini file was created in the ./maas/windows-openstack-imaging-tools directory. Copy this file to the ./maas/scripts directory and rename it to config-server-hci-uefi.ini. The following PowerShell script will do the same as well:
# Define source and destination paths
$sourcePath = "C:\maas\windows-openstack-imaging-tools\config.ini"
$destinationPath = "C:\maas\script\cconfig-server-hci-uefi.ini"

# Check if the source file exists
if (Test-Path -Path $sourcePath) {
    # Copy the file to the destination and rename it
    Copy-Item -Path $sourcePath -Destination $destinationPath
    Write-Host "File copied and renamed successfully."
} else {
    Write-Host "Source file does not exist."
}
The following settings is what I am currently using for my config-server-hci-uefi.ini file.
[DEFAULT]
wim_file_path=F:\Sources\install.wim
image_name=Azure Stack HCI SERVERAZURESTACKHCICORE
image_path=C:\maas\images\HCI.10.2405.0.24.tgz
virtual_disk_format=RAW
image_type=MAAS
disk_layout=UEFI
product_key=""
extra_features=""
extra_capabilities=""
force=False
install_maas_hooks=True
compression_format="tar.gz"
zip_password=""
gold_image=False
gold_image_path=""
vmware_tools_path=""
install_net_3_5=False
custom_resources_path=""
custom_scripts_path="C:\maas\Scripts\HCICS"
enable_administrator_account=True
shrink_image_to_minimum_size=True
enable_custom_wallpaper=False
wallpaper_path=""
wallpaper_solid_color=""
disable_first_logon_animation=False
compress_qcow2=False
zero_unused_volume_sectors=False
extra_packages=""
extra_packages_ignore_errors=False
enable_shutdown_without_logon=False
enable_ping_requests=False
enable_ipv6_eui64=False
enable_active_mode=False
[vm]
administrator_password=##############
external_switch=external
cpu_count=2
ram_size=2147483648
disk_size=42949672960
disable_secure_boot=True
[drivers]
virtio_iso_path=""
virtio_base_path=""
drivers_path=""
[custom]
install_qemu_ga=False
time_zone=""
ntp_servers=""
[updates]
install_updates=False
purge_updates=False
clean_updates_offline=False
clean_updates_online=True
[sysprep]
run_sysprep=True
unattend_xml_path=UnattendTemplateHCI.xml
disable_swap=True
persist_drivers_install=True
[cloudbase_init]
beta_release=False
serial_logging_port=COM1
msi_path=""
cloudbase_init_config_path=""
cloudbase_init_unattended_config_path=""
cloudbase_init_use_local_system=False
cloudbase_init_delayed_start=False
Please note that some of these variables will need to be edited:
- wim_file_path
- image_path
- custom_scripts_path
Additionally, I made changes under the [updates] section. To save time during the build process, I chose not to update the image at this stage. If we decide to include updates in the future, we just need to modify the following section:
[updates]
install_updates=False
purge_updates=False
clean_updates_offline=False
clean_updates_online=False
By making these adjustments, you can tailor the build process to your specific requirements and decide whether or not to include updates during the build.
Edit UnattendedTemplateHCI.xml File
I haven’t had extensive experience working with unattended.xml files, apart from using some with ConfigMgr. I understand they offer a lot of customization options. Here are a few resources for working with unattended.xml files:
Update Windows Settings and Scripts to Create Your Own Answer File
However, we have an UnattendTemplate2022.xml file located in the repository we’ve cloned, which we will use for now. Copy this UnattendTemplate2022.xml file and rename it to UnattendTemplateHCI.xml.
Here is an example of the UnattendTemplateHCI.xml file that can be used. However, I have recently switched to using customer PowerShell scripts:
<?xml version="1.0" encoding="utf-8"?>
<unattend xmlns="urn:schemas-microsoft-com:unattend">
    <settings pass="windowsPE">
        <component name="Microsoft-Windows-Setup" processorArchitecture="amd64" publicKeyToken="31bf3856ad364e35" language="neutral" versionScope="nonSxS" xmlns:wcm="http://schemas.microsoft.com/WMIConfig/2002/State" xmlns:xsi="http://www.w3.org/2001/XMLSchema-instance">
            <DiskConfiguration>
                <WillShowUI>OnError</WillShowUI>
                <Disk wcm:action="add">
                    <CreatePartitions>
                        <CreatePartition wcm:action="add">
                            <Order>1</Order>
                            <Size>100</Size>
                            <Type>Primary</Type>
                        </CreatePartition>
                        <CreatePartition wcm:action="add">
                            <Order>2</Order>
                            <Extend>true</Extend>
                            <Type>Primary</Type>
                        </CreatePartition>
                    </CreatePartitions>
                    <ModifyPartitions>
                        <ModifyPartition wcm:action="add">
                            <Active>true</Active>
                            <Label>Boot</Label>
                            <Format>NTFS</Format>
                            <Order>1</Order>
                            <PartitionID>1</PartitionID>
                        </ModifyPartition>
                        <ModifyPartition wcm:action="add">
                            <Format>NTFS</Format>
                            <Order>2</Order>
                            <PartitionID>2</PartitionID>
                            <Label>System</Label>
                        </ModifyPartition>
                    </ModifyPartitions>
                    <DiskID>0</DiskID>
                    <WillWipeDisk>true</WillWipeDisk>
                </Disk>
            </DiskConfiguration>
            <ImageInstall>
                <OSImage>
                    <InstallTo>
                        <PartitionID>2</PartitionID>
                        <DiskID>0</DiskID>
                    </InstallTo>
                    <InstallToAvailablePartition>false</InstallToAvailablePartition>
                    <WillShowUI>OnError</WillShowUI>
                    <InstallFrom>
                        <MetaData wcm:action="add">
                            <Key>/IMAGE/NAME</Key>
                            <Value>Azure Stack HCI SERVERAZURESTACKHCICORE</Value>
                        </MetaData>
                    </InstallFrom>
                </OSImage>
            </ImageInstall>
            <UserData>
                <AcceptEula>true</AcceptEula>
                <!--
                <ProductKey>
                    <Key>XXXXX-XXXXX-XXXXX-XXXXX-XXXXX</Key>
                    <WillShowUI>OnError</WillShowUI>
                </ProductKey>
                -->
            </UserData>
        </component>
        <component name="Microsoft-Windows-International-Core-WinPE" processorArchitecture="amd64" publicKeyToken="31bf3856ad364e35" language="neutral" versionScope="nonSxS" xmlns:wcm="http://schemas.microsoft.com/WMIConfig/2002/State" xmlns:xsi="http://www.w3.org/2001/XMLSchema-instance">
            <SetupUILanguage>
                <UILanguage>en-US</UILanguage>
            </SetupUILanguage>
            <InputLocale>en-US</InputLocale>
            <UILanguage>en-US</UILanguage>
            <SystemLocale>en-US</SystemLocale>
            <UserLocale>en-US</UserLocale>
        </component>
    </settings>
    <settings pass="oobeSystem">
        <component name="Microsoft-Windows-Shell-Setup" processorArchitecture="amd64" publicKeyToken="31bf3856ad364e35" language="neutral" versionScope="nonSxS" xmlns:wcm="http://schemas.microsoft.com/WMIConfig/2002/State" xmlns:xsi="http://www.w3.org/2001/XMLSchema-instance">
            <OOBE>
                <HideEULAPage>true</HideEULAPage>
                <!--
                    ProtectYourPC:
                    1 Specifies the recommended level of protection for your computer.
                    2 Specifies that only updates are installed.
                    3 Specifies that automatic protection is disabled.
                -->
                <ProtectYourPC>3</ProtectYourPC>
                <HideWirelessSetupInOOBE>true</HideWirelessSetupInOOBE>
                <!-- Comment the following three options on Windows Vista / 7 and Windows Server 2008 / 2008 R2 -->
                <HideOnlineAccountScreens>true</HideOnlineAccountScreens>
                <HideLocalAccountScreen>true</HideLocalAccountScreen>
                <HideOEMRegistrationScreen>true</HideOEMRegistrationScreen>
                <!--
                <SkipMachineOOBE>true</SkipMachineOOBE>
                <SkipUserOOBE>true</SkipUserOOBE>
                -->
            </OOBE>
            <!-- Use FirstLogonCommands instead of LogonCommands if you don't need to install Windows Updates -->
            <LogonCommands>
                <AsynchronousCommand wcm:action="add">
                    <CommandLine>%SystemRoot%\System32\WindowsPowerShell\v1.0\powershell -NoLogo -NonInteractive -ExecutionPolicy RemoteSigned -File %SystemDrive%\UnattendResources\Logon.ps1</CommandLine>
                    <Order>1</Order>
                </AsynchronousCommand>
            </LogonCommands>
            <FirstLogonCommands>
                <SynchronousCommand wcm:action="add">
                    <CommandLine>%SystemRoot%\System32\WindowsPowerShell\v1.0\powershell -NoLogo -NonInteractive -ExecutionPolicy RemoteSigned -File %SystemDrive%\UnattendResources\FirstLogon.ps1</CommandLine>
                    <Order>1</Order>
                </SynchronousCommand>
            </FirstLogonCommands>
            <UserAccounts>
                <!--
                    Password to be used only during initial provisioning.
                    Must be reset with final Sysprep.
                -->
                <AdministratorPassword>
                    <Value>#########</Value>
                    <PlainText>true</PlainText>
                </AdministratorPassword>
                <!-- The following is needed on a client OS -->

                <LocalAccounts>
                    <LocalAccount wcm:action="add">
                        <Description>Admin user</Description>
                        <DisplayName>Admin</DisplayName>
                        <Group>Administrators</Group>
                        <Name>Admin</Name>
                    </LocalAccount>
                </LocalAccounts>

            </UserAccounts>
            <AutoLogon>
                <Password>
                    <Value>###########</Value>
                    <PlainText>true</PlainText>
                </Password>
                <Enabled>true</Enabled>
                <LogonCount>5</LogonCount>
                <Username>Administrator</Username>
            </AutoLogon>
            <ComputerName>*</ComputerName>
        </component>
        <component name="Microsoft-Windows-International-Core" processorArchitecture="amd64" publicKeyToken="31bf3856ad364e35" language="neutral" versionScope="nonSxS" xmlns:wcm="http://schemas.microsoft.com/WMIConfig/2002/State" xmlns:xsi="http://www.w3.org/2001/XMLSchema-instance">
            <InputLocale>en-US</InputLocale>
            <UILanguage>en-US</UILanguage>
            <UILanguageFallback>en-us</UILanguageFallback>
            <SystemLocale>en-US</SystemLocale>
            <UserLocale>en-US</UserLocale>
        </component>
    </settings>
    <settings pass="specialize">
        <component name="Microsoft-Windows-TerminalServices-LocalSessionManager" processorArchitecture="amd64" publicKeyToken="31bf3856ad364e35" language="neutral" versionScope="nonSxS" xmlns:wcm="http://schemas.microsoft.com/WMIConfig/2002/State" xmlns:xsi="http://www.w3.org/2001/XMLSchema-instance">
            <fDenyTSConnections>false</fDenyTSConnections>
        </component>
        <component name="Microsoft-Windows-TerminalServices-RDP-WinStationExtensions" processorArchitecture="amd64" publicKeyToken="31bf3856ad364e35" language="neutral" versionScope="nonSxS" xmlns:wcm="http://schemas.microsoft.com/WMIConfig/2002/State" xmlns:xsi="http://www.w3.org/2001/XMLSchema-instance">
            <UserAuthentication>0</UserAuthentication>
        </component>
        <component name="Networking-MPSSVC-Svc" processorArchitecture="amd64" publicKeyToken="31bf3856ad364e35" language="neutral" versionScope="nonSxS" xmlns:wcm="http://schemas.microsoft.com/WMIConfig/2002/State" xmlns:xsi="http://www.w3.org/2001/XMLSchema-instance">
            <FirewallGroups>
                <FirewallGroup wcm:action="add" wcm:keyValue="RemoteDesktop">
                    <Active>true</Active>
                    <Profile>all</Profile>
                    <Group>@FirewallAPI.dll,-28752</Group>
                </FirewallGroup>
            </FirewallGroups>
        </component>
        <component name="Microsoft-Windows-Shell-Setup" processorArchitecture="amd64" publicKeyToken="31bf3856ad364e35" language="neutral" versionScope="NonSxS" xmlns:wcm="http://schemas.microsoft.com/WMIConfig/2002/State" xmlns:xsi="http://www.w3.org/2001/XMLSchema-instance">
            <TimeZone>UTC</TimeZone>
            <ComputerName>*</ComputerName>
            <!--
            <ProductKey>XXXXX-XXXXX-XXXXX-XXXXX-XXXXX</ProductKey>
            -->
        </component>
        <component name="Microsoft-Windows-Deployment" processorArchitecture="amd64" publicKeyToken="31bf3856ad364e35" language="neutral" versionScope="nonSxS" xmlns:wcm="http://schemas.microsoft.com/WMIConfig/2002/State" xmlns:xsi="http://www.w3.org/2001/XMLSchema-instance">
            <RunSynchronous>
                <RunSynchronousCommand wcm:action="add">
                    <Order>1</Order>
                    <Path>powershell -NoLogo -NonInteractive -ExecutionPolicy RemoteSigned -File %SystemDrive%\UnattendResources\Specialize.ps1</Path>
                    <Description>Run Specialize script</Description>
                </RunSynchronousCommand>
            </RunSynchronous>
            <ExtendOSPartition>
                <Extend>true</Extend>
            </ExtendOSPartition>
        </component>
        <component name="Microsoft-Windows-SQMApi" processorArchitecture="amd64" publicKeyToken="31bf3856ad364e35" language="neutral" versionScope="NonSxS" xmlns:wcm="http://schemas.microsoft.com/WMIConfig/2002/State" xmlns:xsi="http://www.w3.org/2001/XMLSchema-instance">
            <CEIPEnabled>0</CEIPEnabled>
        </component>
    </settings>
</unattend>
This XML file is a basic template that can be customized further to suit specific deployment needs.
Create Custom Scripts
I am currently learning more about custom scripts that can be run before and after some of the build processes. At this moment, I don’t include a custom script for my HCI builds. However, I am considering shifting towards using custom scripts instead of relying solely on the unattended.xml files mentioned above.
Custom scripts offer greater flexibility and control over the deployment process, allowing for more granular configuration and automation tailored to specific needs. By incorporating these scripts, I can enhance the efficiency and effectiveness of my HCI builds. As I gain more experience and understanding, I plan to transition to using custom scripts to optimize the build process further
Here is an example of the custom script that I have started to use. I have named it RunBeforeSysprep.ps1 and have placed it in the ./maas/scripts/hcics directory.
function Write-Log {
    Param($messageToOut)
    add-content -path "c:\build.log" ("{0} - {1}" -f @((Get-Date), $messageToOut))
}

Write-Log "RunBeforeSysprep.ps1 starting"

write-Log "Allow RDP"
Set-ItemProperty -Path 'HKLM:\System\CurrentControlSet\Control\Terminal Server' -name 'fDenyTSConnections' -value 0
Enable-NetFirewallRule -DisplayGroup 'Remote Desktop'

write-Log  "Allow All RDP clients"
(Get-WmiObject -class 'Win32_TSGeneralSetting' -Namespace root\cimv2\terminalservices -ComputerName $env:COMPUTERNAME -Filter 'TerminalName="RDP-tcp"').SetUserAuthenticationRequired(0)


write-Log "avahcAdmin"
$Password = ConvertTo-SecureString -String "password" -AsPlainText -Force
New-LocalUser -Name "avahcAdmin" -Password $Password -AccountNeverExpires
Add-LocalGroupMember -Group "Administrators" -Member "avahcAdmin"
& cmd.exe /c 'net.exe user "avahcAdmin" "password"'

# Define the new password
$newPassword = "password"

# Function to set password for the local administrator account
function Set-LocalAdminPassword {
    param (
        [string]$password
    )

    try {
        # Get the local administrator account
        $adminAccount = Get-LocalUser -Name "Administrator"

        if ($adminAccount.Enabled) {
            # Set the password for the local administrator account
            $adminAccount | Set-LocalUser -Password (ConvertTo-SecureString $password -AsPlainText -Force)
            Write-Host "Password for the local Administrator account has been set successfully."
        } else {
            Write-Host "The local Administrator account is disabled."
        }
    } catch {
        Write-Error "Failed to set password for the local Administrator account: $_"
    }
}

# Set the password for the local administrator account
Set-LocalAdminPassword -password $newPassword

# Optionally, auto-logon settings
Set-ItemProperty -Path "HKLM:\SOFTWARE\Microsoft\Windows NT\CurrentVersion\Winlogon" -Name "AutoAdminLogon" -Value "5"
Set-ItemProperty -Path "HKLM:\SOFTWARE\Microsoft\Windows NT\CurrentVersion\Winlogon" -Name "DefaultUsername" -Value "Administrator"
Set-ItemProperty -Path "HKLM:\SOFTWARE\Microsoft\Windows NT\CurrentVersion\Winlogon" -Name "DefaultPassword" -Value $AdminPassword

Write-Log "RunBeforeSysprep.ps1 Finished"
Edit Logon.ps1 Script
During the creation of this blog, I encountered issues discussed on the CryingCloud blog regarding the image malfunctioning when the system is generalized during the sysprep process. To address this, we will edit the Logon.ps1 PowerShell script to remove the /generalize parameter, preventing the HCI image from being generalized during the sysprep process. This script is located in the ./maas/windows-openstack-imaging-tools/UnattendedResources directory.
However, please be aware that not generalizing images can cause problems in the future, such as duplicate SIDs (Security Identifiers), which can lead to issues in domain environments. For more information on generalizing an image during sysprep, refer to the Microsoft Learn documentation.
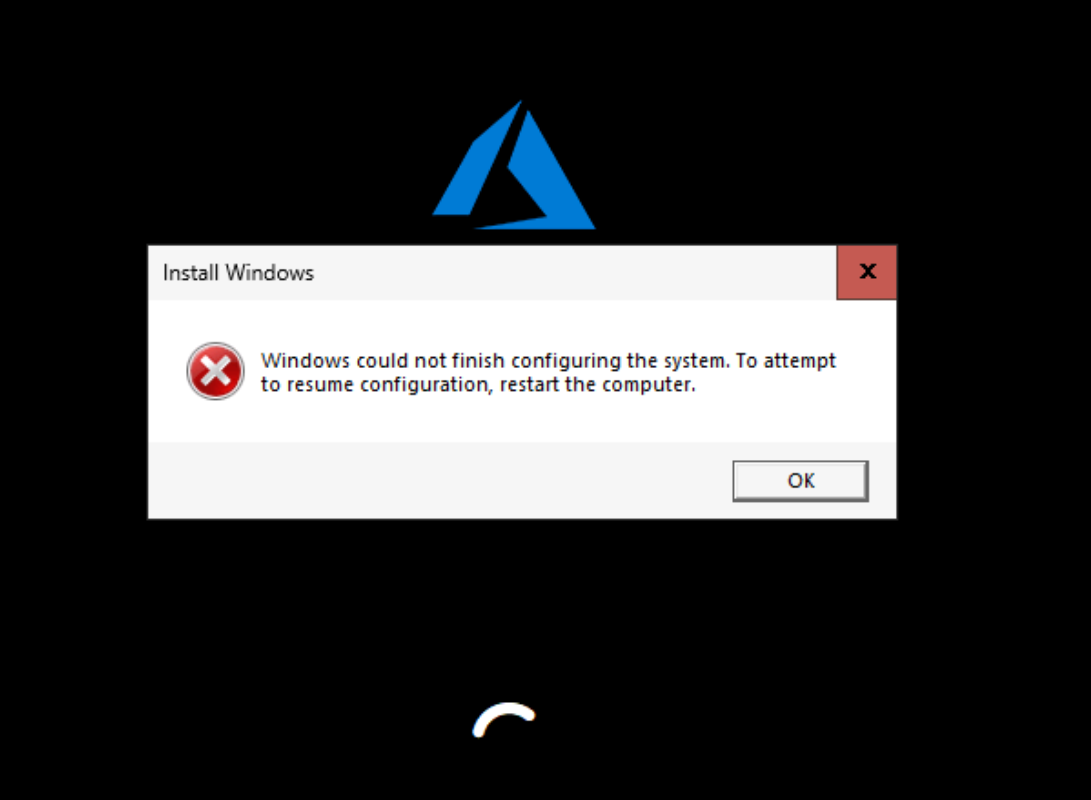
The following is what we changed:
On line 720 the existing code should show:
& "$ENV:SystemRoot\System32\Sysprep\Sysprep.exe" `/generalize `/oobe `/shutdown `/unattend:"$unattendedXmlPath"
We will remove the `/generalize section and save the file.
& "$ENV:SystemRoot\System32\Sysprep\Sysprep.exe" `/oobe `/shutdown `/unattend:"$unattendedXmlPath"
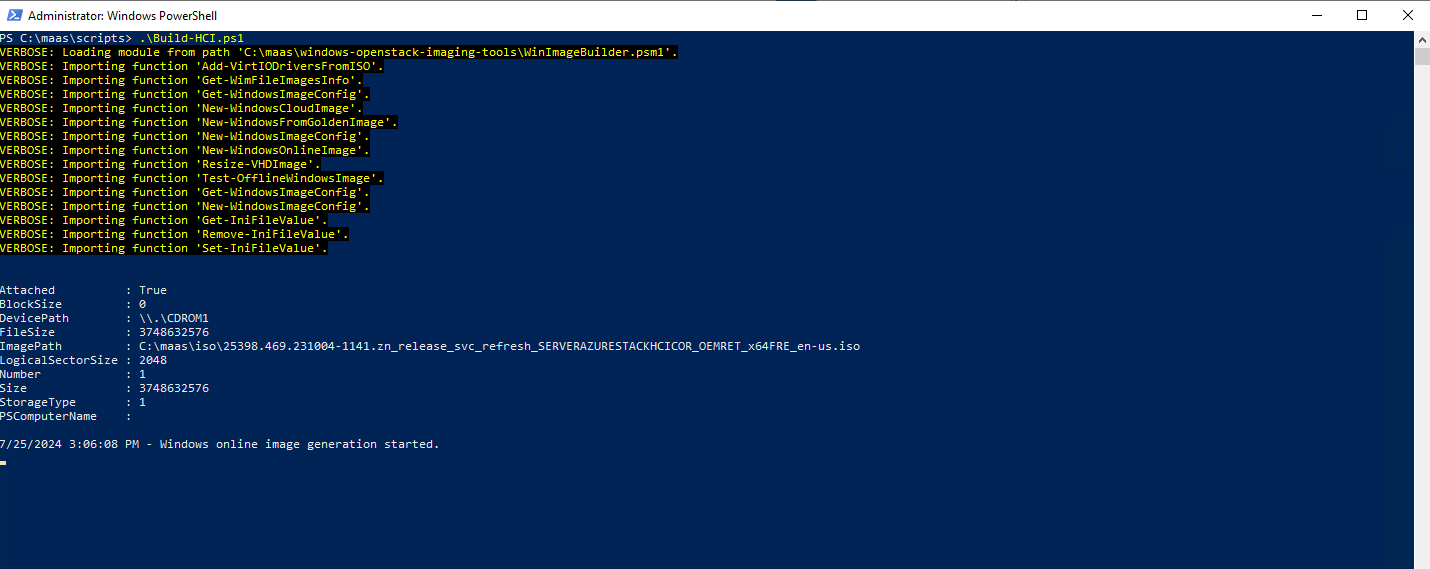
Create the Build Script
Now we will create the build script. Here is a copy of my build script:
Param (
    $VerbosePreference = "Continue",
    $ISOImage = "C:\maas\iso\25398.469.231004-1141.zn_release_svc_refresh_SERVERAZURESTACKHCICOR_OEMRET_x64FRE_en-us.iso",
    $ConfigFilePath = "C:\maas\Scripts\config-Server-HCI-UEFI.ini",
    $CloudBuildModules = "C:\maas\windows-openstack-imaging-tools"
)
Set-Location $CloudBuildModules

Import-Module .\WinImageBuilder.psm1
Import-Module .\Config.psm1
Import-Module .\UnattendResources\ini.psm1

Mount-DiskImage -ImagePath $ISOImage
$MountLetter = (Get-DiskImage $ISOImage| Get-Volume).DriveLetter

# Create a config.ini file using the built in function, then set them accordingly to your needs
# New-WindowsImageConfig -ConfigFilePath $ConfigFilePath
# To automate the config options setting:
Set-IniFileValue -Path (Resolve-Path $ConfigFilePath) -Section "DEFAULT" -Key "wim_file_path" -Value ("$MountLetter" + ":\Sources\install.wim")

#New Online image
New-WindowsOnlineImage -ConfigFilePath $ConfigFilePath

Dismount-DiskImage $ISOImage
As you can see, I have the $ISOImage variable linked to my downloaded Azure Stack HCI ISO. The $ConfigFilePath is linked to my config-server-hci-uefi.ini file, and the $CloudBuildModules is linked to the windows-openstack-imaging-tools directory.
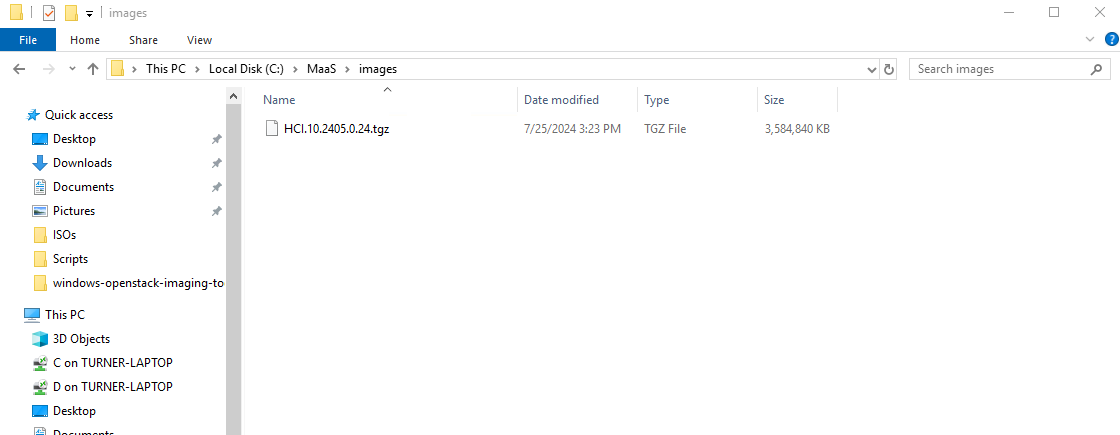
Referring back to the config-server-hci-uefi.ini file, we can see that the image will be created in the ./maas/images/ directory. I have named the file hci.10.2405.0.24.tgz, based on the most recent baseline available for download. This naming convention helps me keep track of my builds based on Microsoft releases.
From experience, I always check my image server to ensure nothing is mounted to the wim_file_path specified in the config-server-hci-uefi.ini file. For my setup, I have used the F drive. The script will try to mount it to the F drive, and I have been fortunate in the past when I forgot to unmount previous attempts that it was still the Azure Stack HCI OS ISO and not another OS ISO.
Build The Image
Now we will run our build script. From the ./maas/scripts directory run the build-hci.ps1 script we just created.

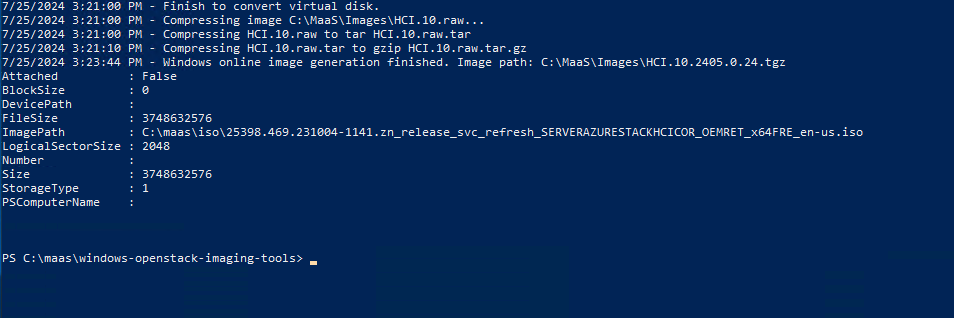
The script will mount the Azure Stack HCI ISO, it will create the Virtual Disk image, generate an unattend xml file based off of the given unattended.xml that we created. It will then create the Hyper-V VM and then also apply the ISO image to that Hyper-V VM and disk it just created.
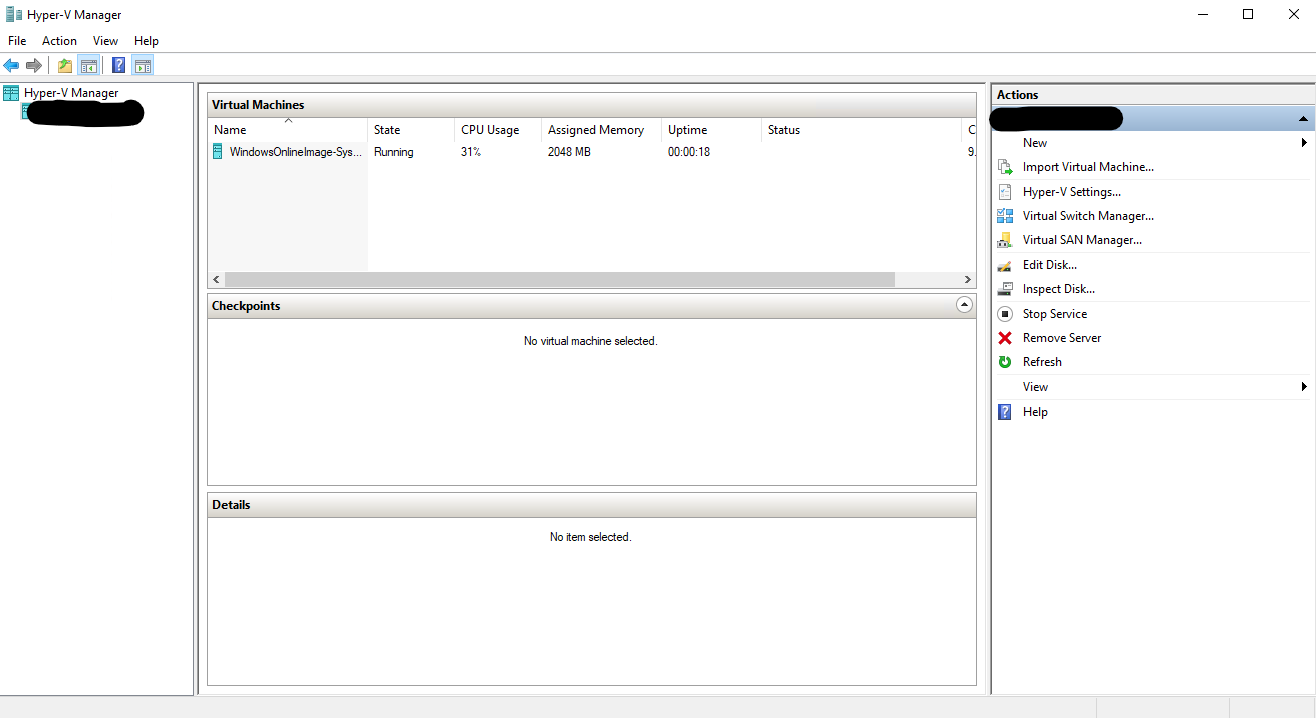
Once the VM is online, the script will start to customize the image running any of the custom scripts that we may have created. It will apply the settings from the unattended.xml file we created. IT will then start to download the Cloudbase-init files needed for maas deployments.
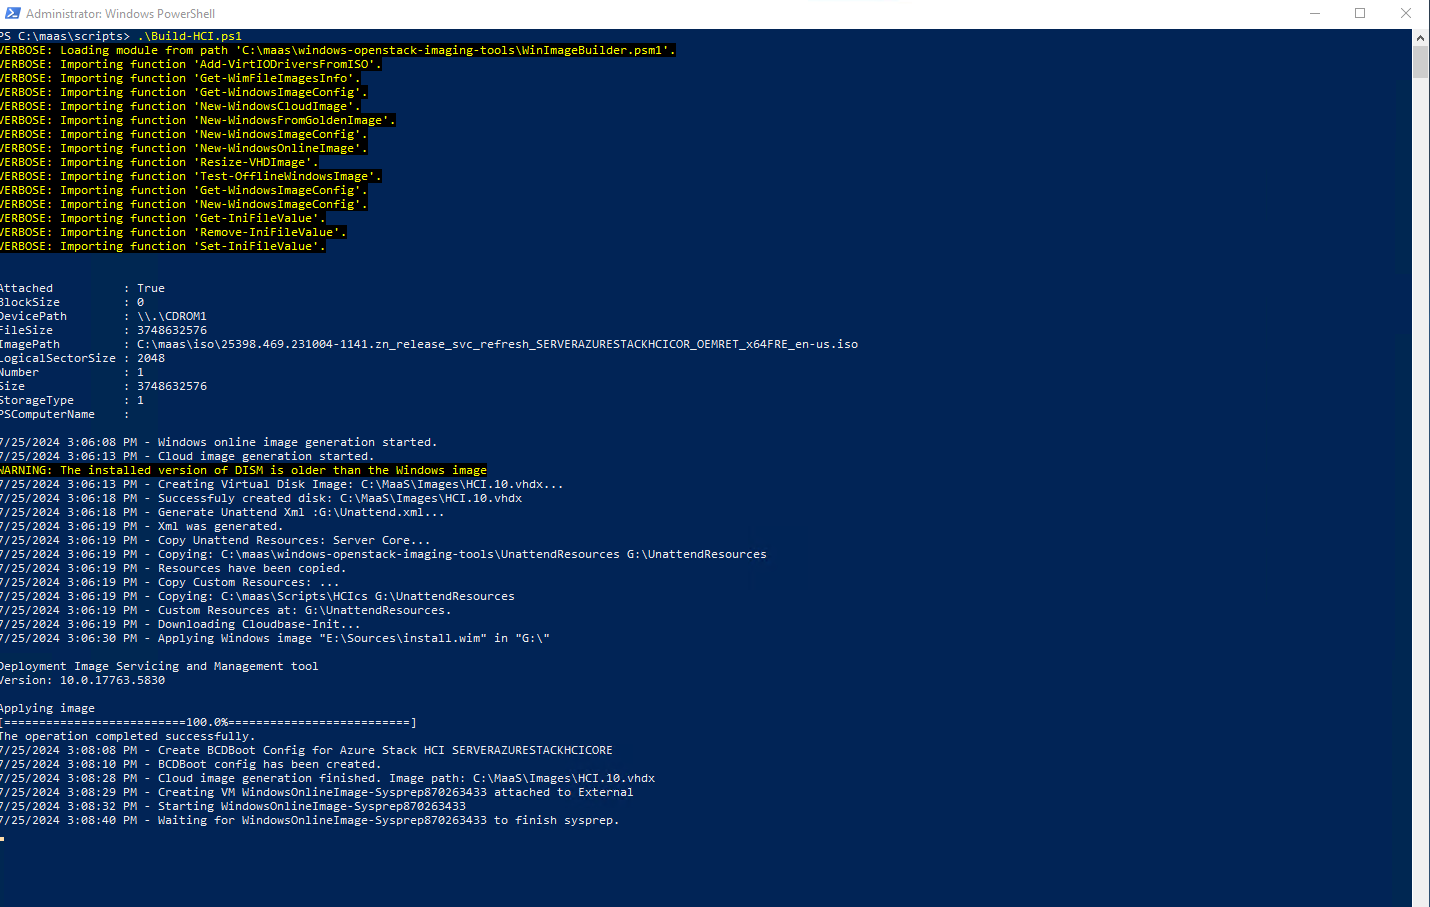
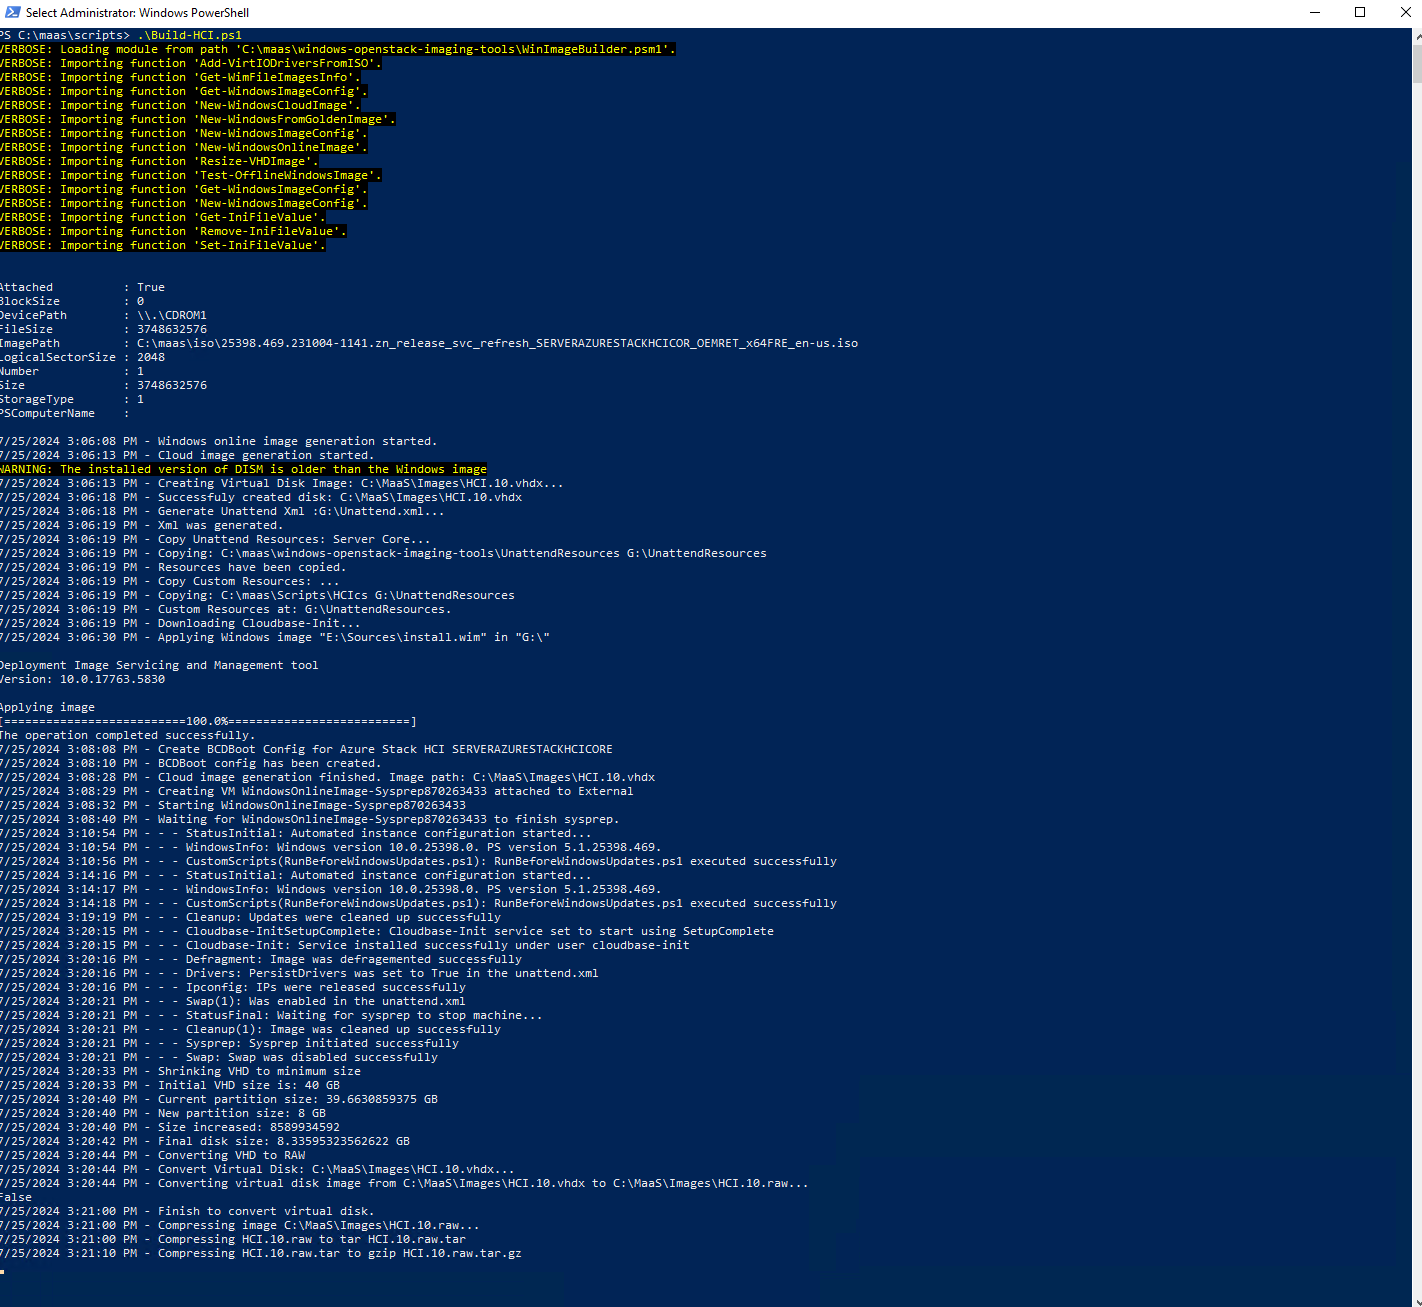
Last it will start to clean the image and prep it to run sysprep. Once that is done, the image will be sysprepped and then the vm shutdown.
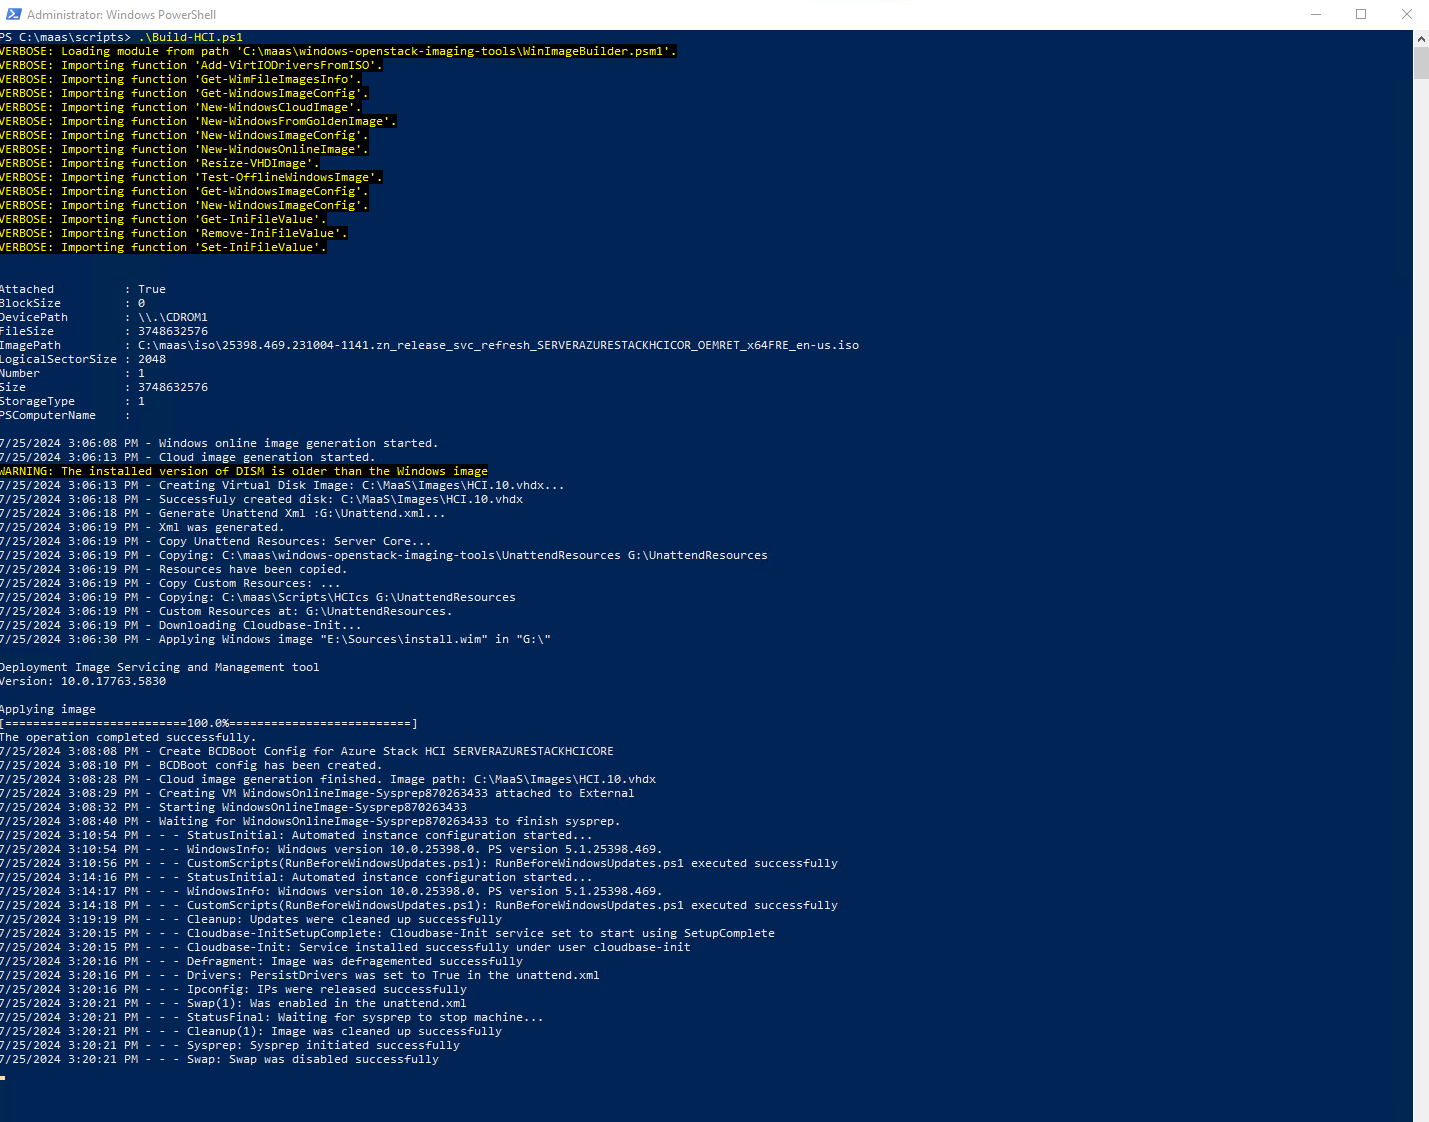
Once the VM is shutdown, the script will shrink the VHD file. It then converts the vhd to raw. Once it is converted to raw format, it is compressed into a tar.gz file.

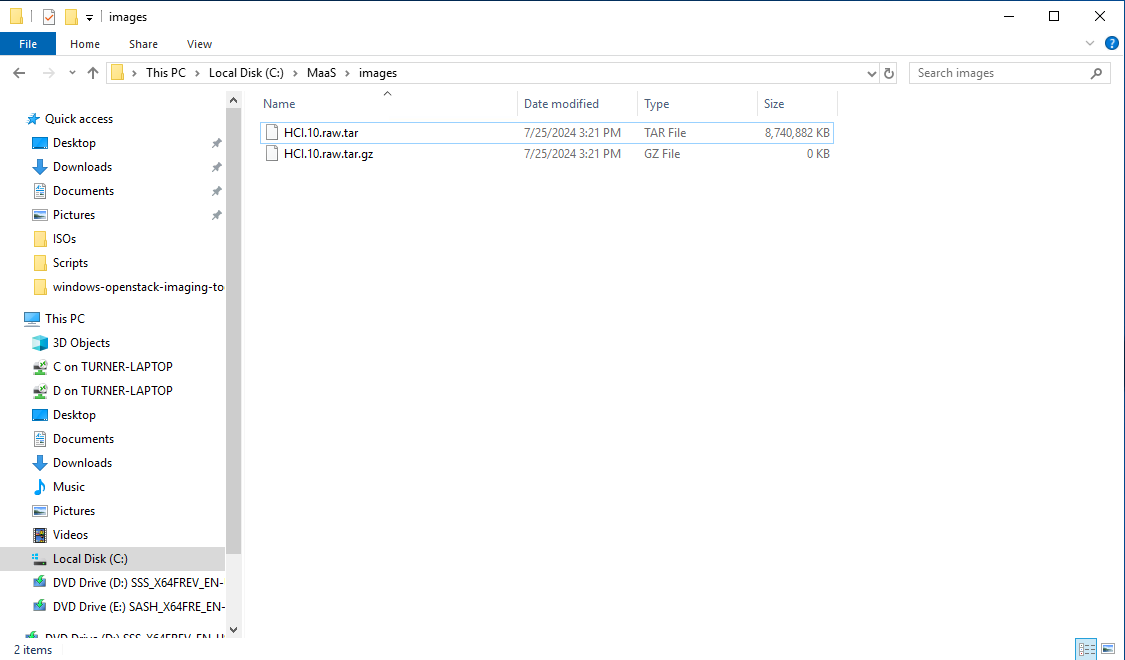
Once we have our file compressed and in the tgz format, we are now ready to move forward and send it to our MAAS server.
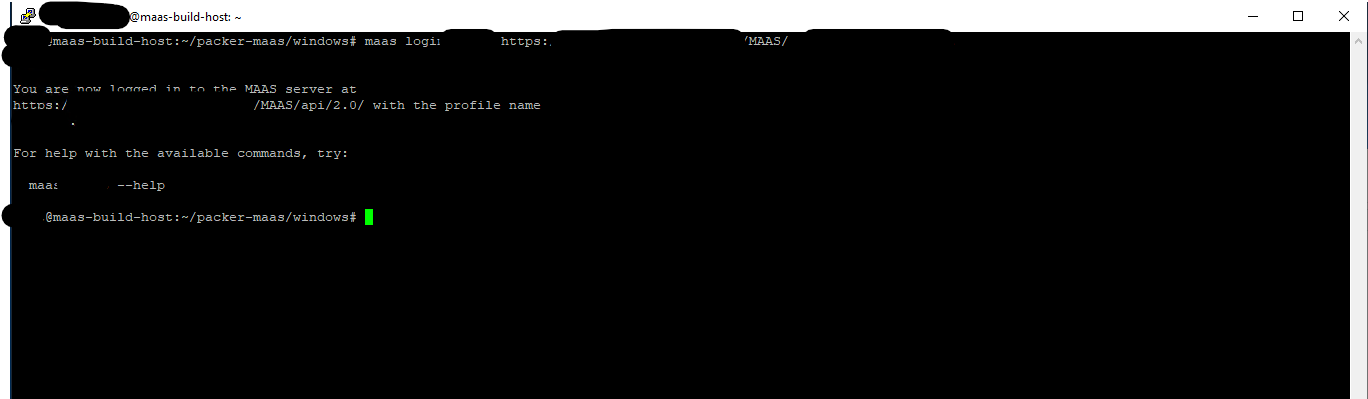
Getting Images to MAAS
Using a tool like WinSCP, we will need to copy our newly created image to a MAAS Build Server, which is essentially another Ubuntu server running the MAAS CLI. Once the file has been successfully copied to our build server, we can SSH into that server using PowerShell, PuTTY, or any other preferred tool.
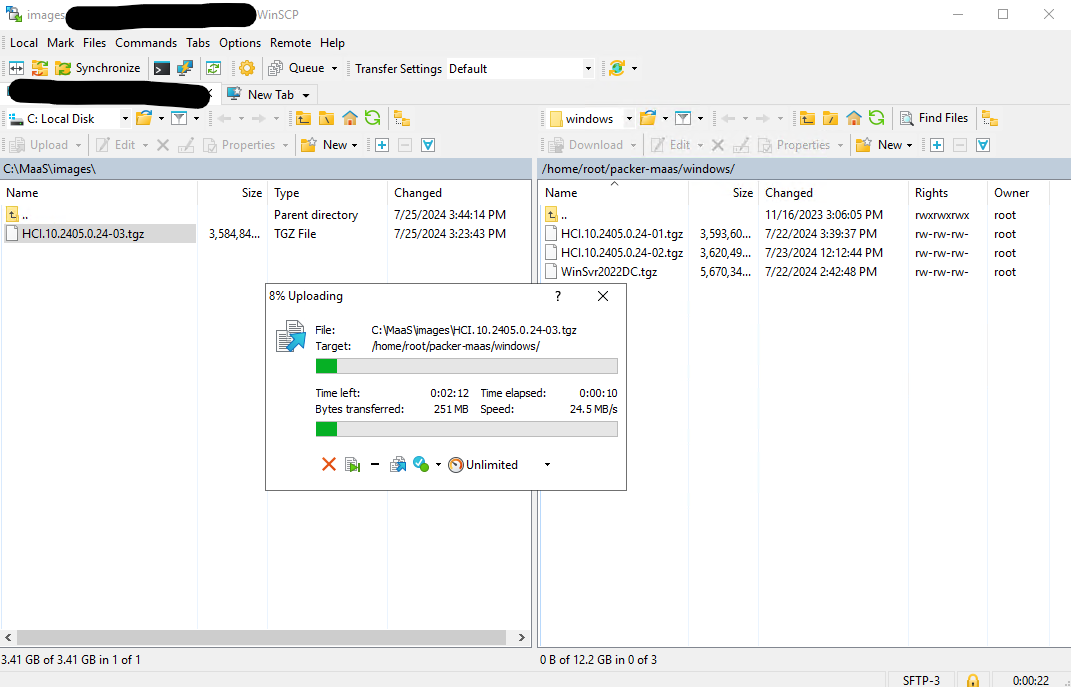
Once connected to the build machine via SSH, we will confirm we can see the newly uploaded image.

Next we need to connect our session to our MAAS server.
maas login <targetname> https://<maas url>/MAAS/ <secret>
More detailed information on how to do this can be found here https://maas.io/docs/tutorial-try-the-maas-cli.
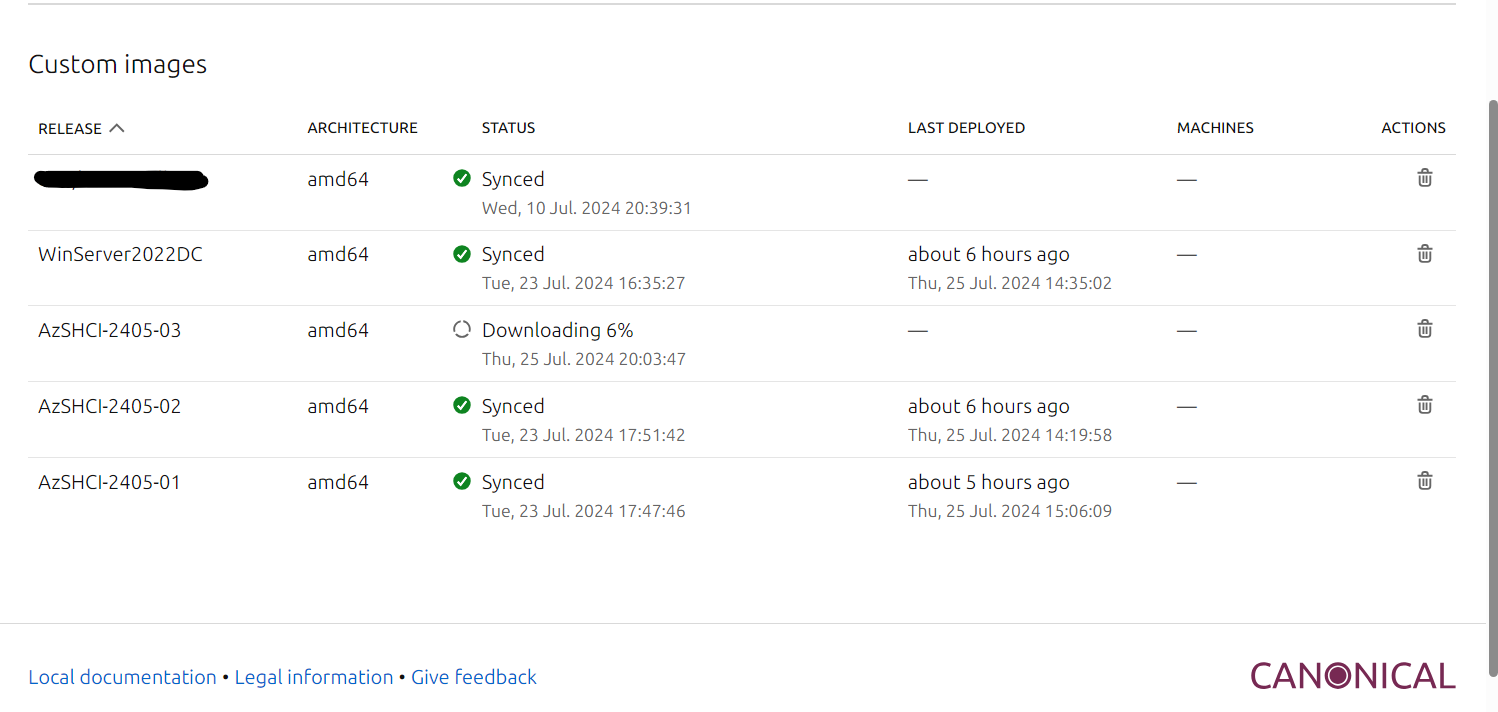
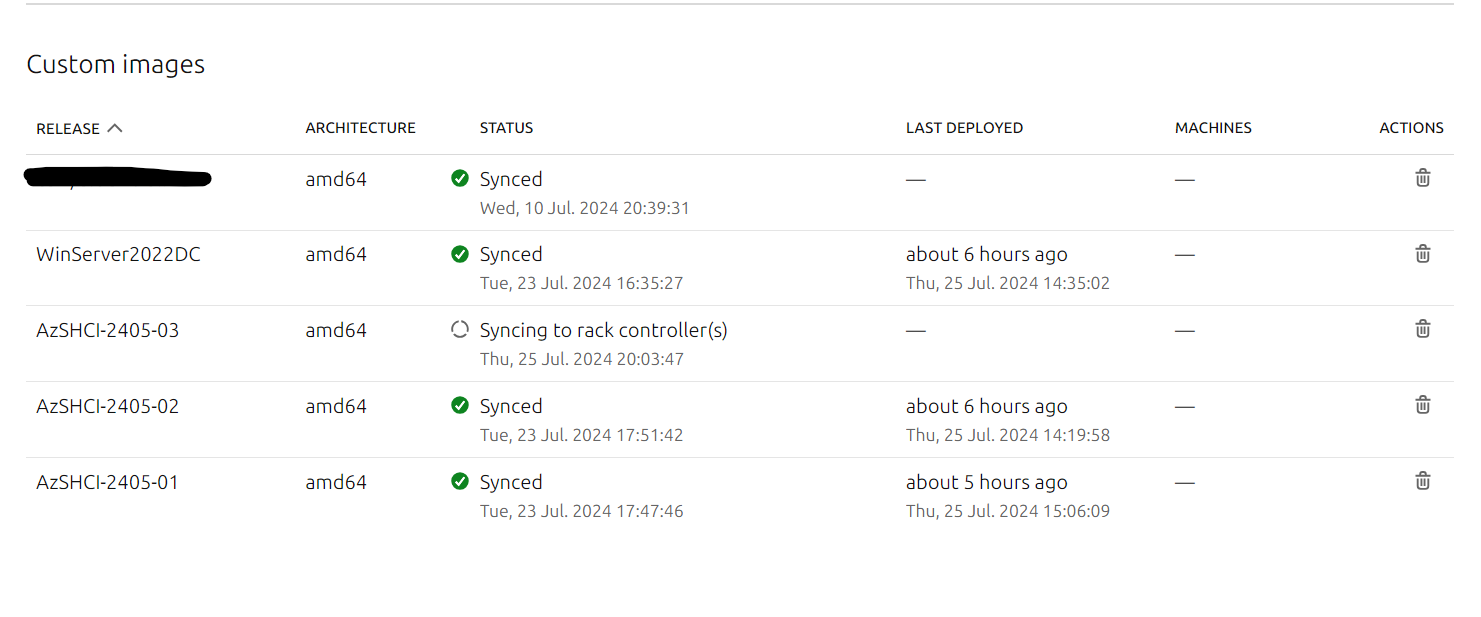
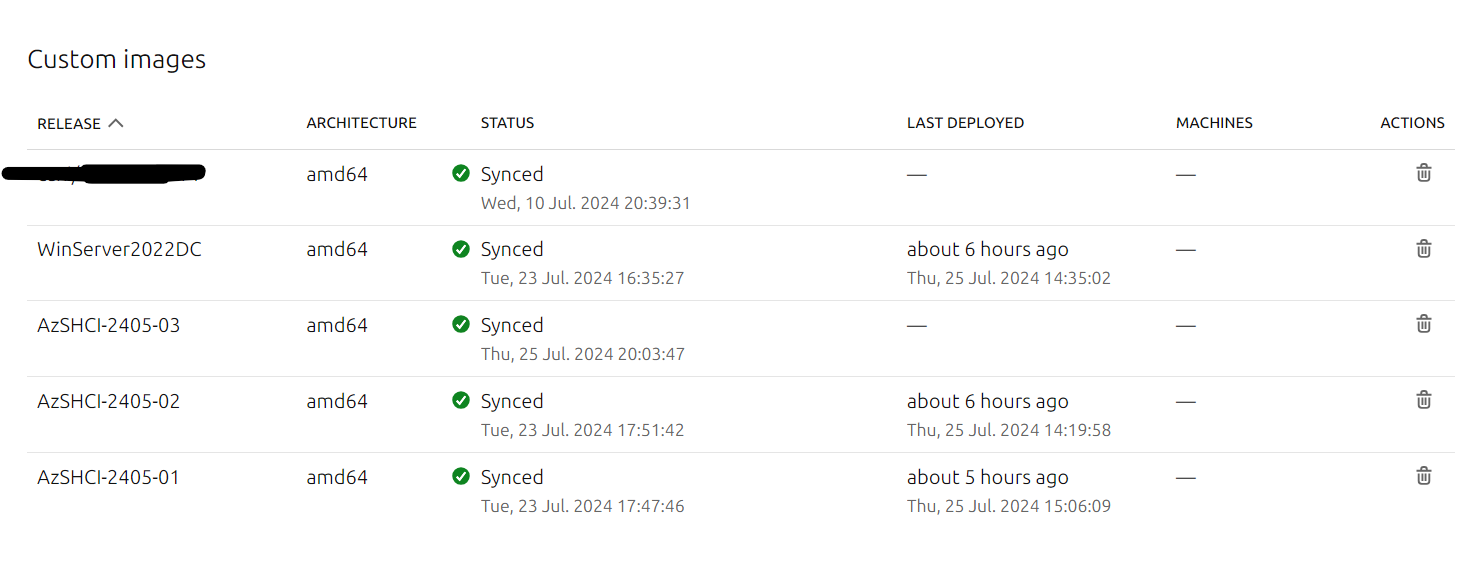
Once connected, we can now run the command to import the image into the MAAS Image directory.
maas <target name> boot-resources create name='windows/AzSHCI-10.2405-03' title='AzSHCI-2405-03' architecture='amd64/generic' filetype='ddtgz' content@=HCI.10.2405.0.24-03.tgz
Now, we can go over to our MAAS server, and if we go to Images, and scroll down to Custom Images, we can now see that our image is being downloaded. In a few minutes, we should be able to test deploy this newly created Azure Stack HCI image to a test machine.
Deploying The Image
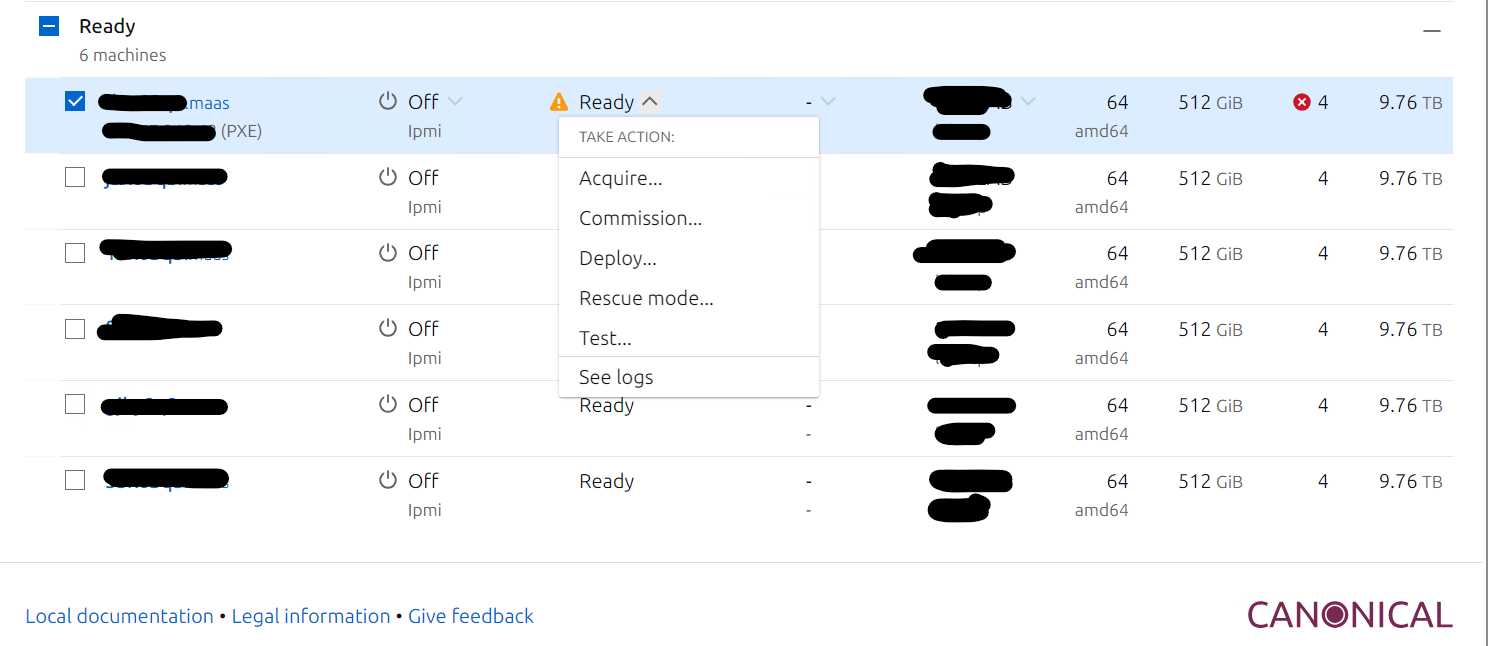
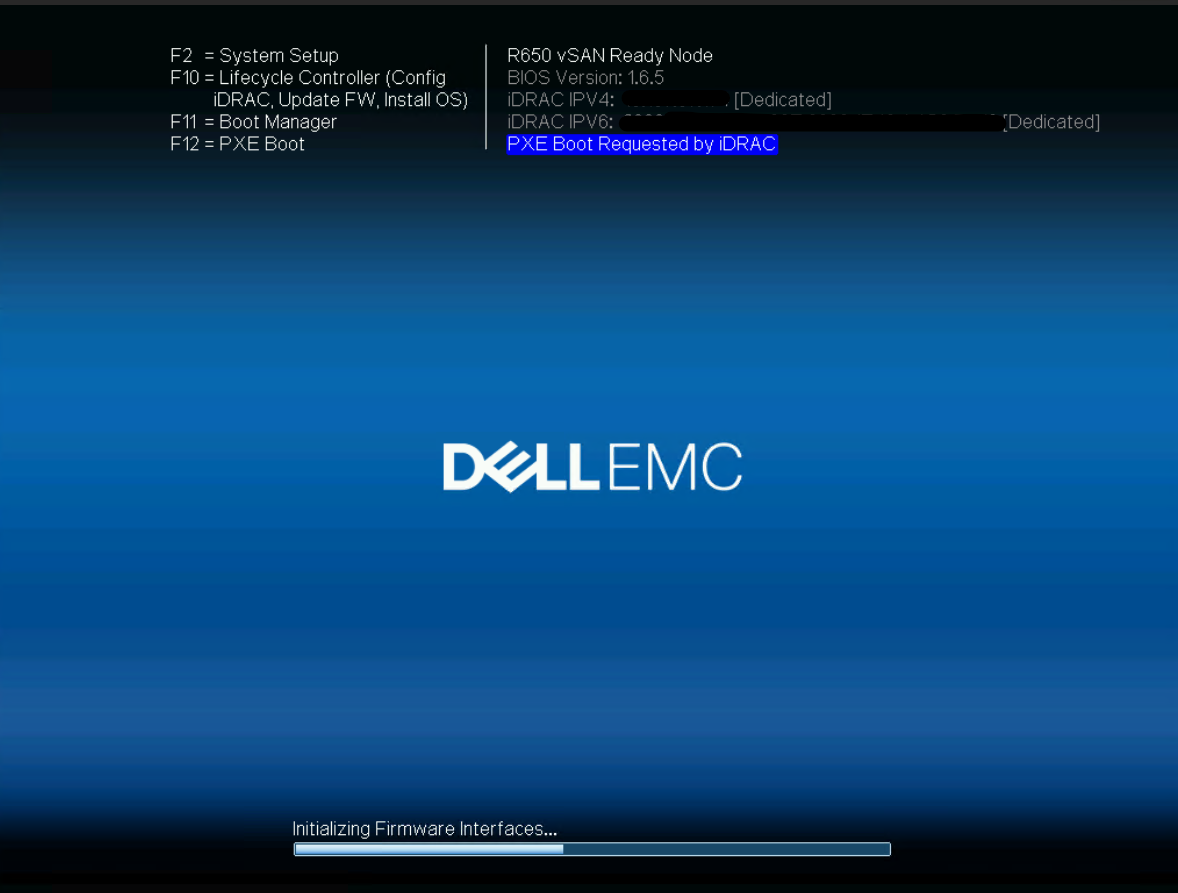
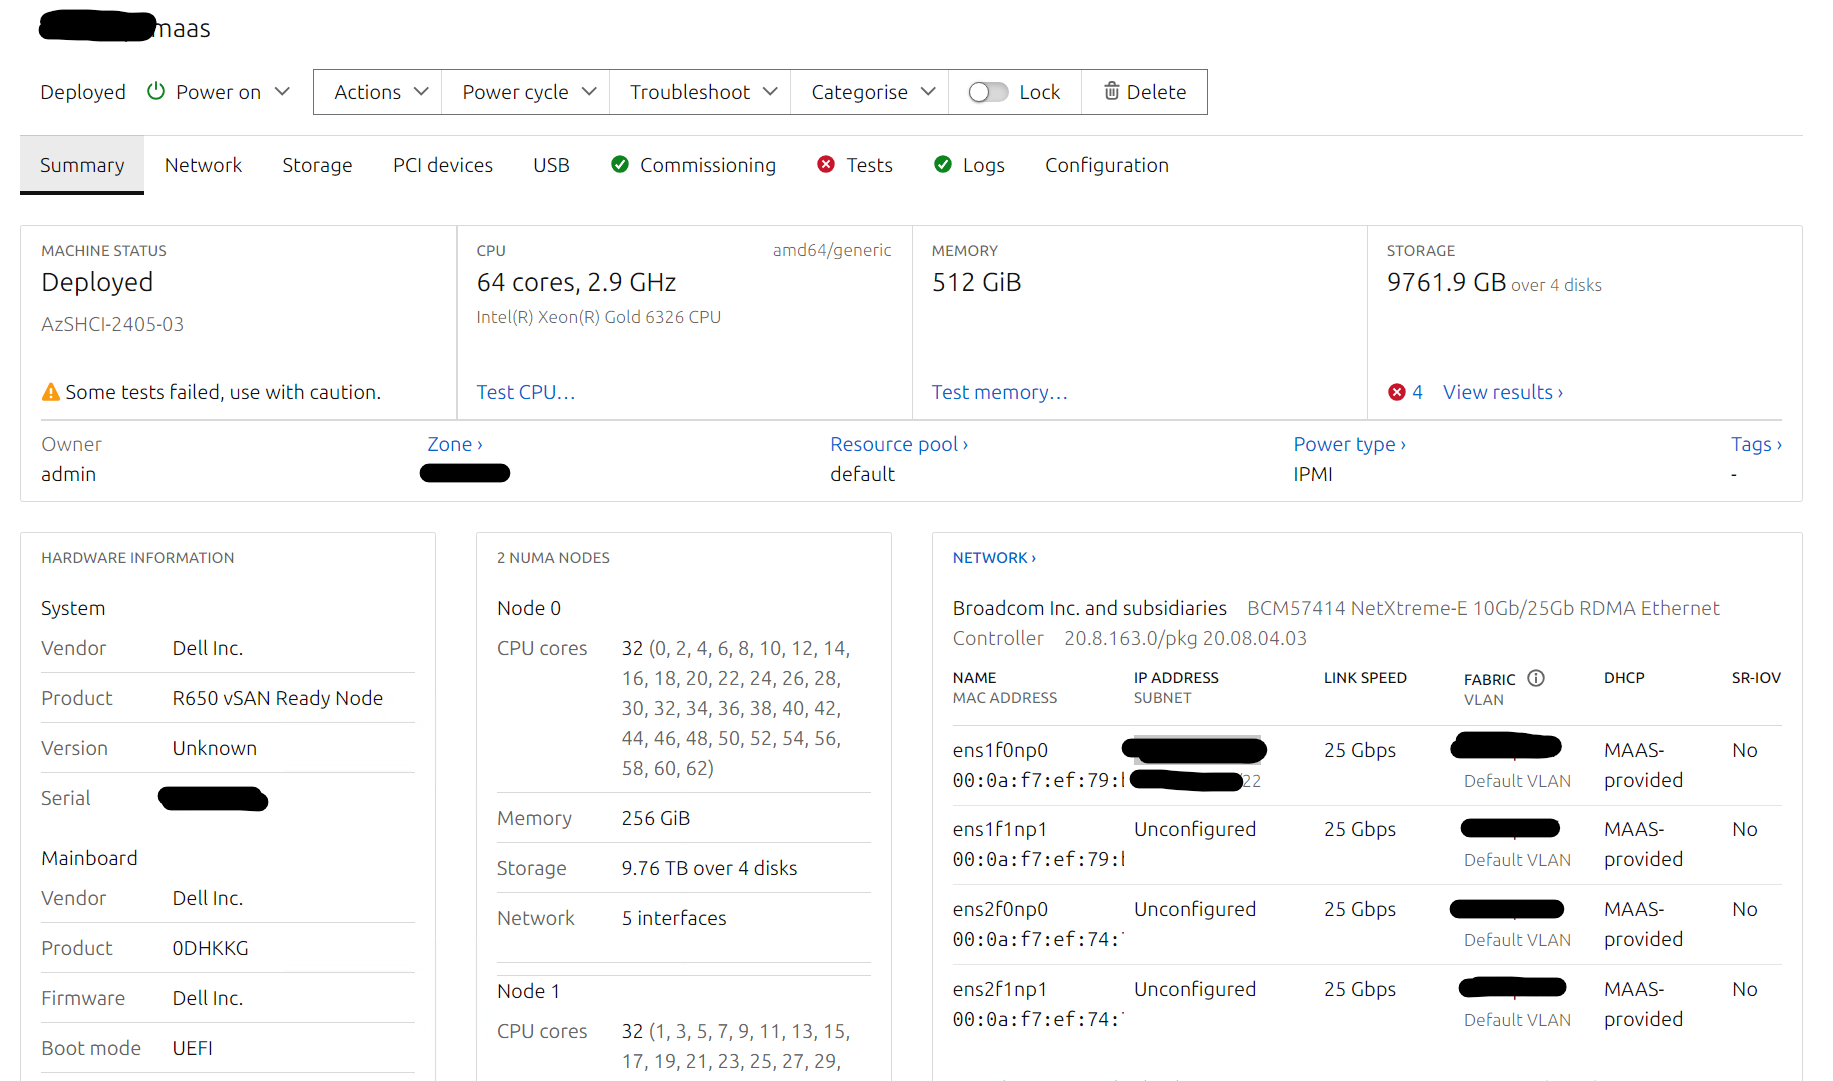
Now it is time to test deploy this image. I use a Dell R650 vSAN Ready Node as a test image box. We could also use a Hyper-V VM if needed. From the MAAS Portal, we will select the machine we want to deploy the Azure Stack HCI Image to.

Next to Ready, click the drop down and click allocate. Once it has been allocated, click the drop down next to Allocated, select Deploy.
The blade to the right will pop up. Under OS, select Windows, under Release select the Azure Stack HCI OS release that we just added.
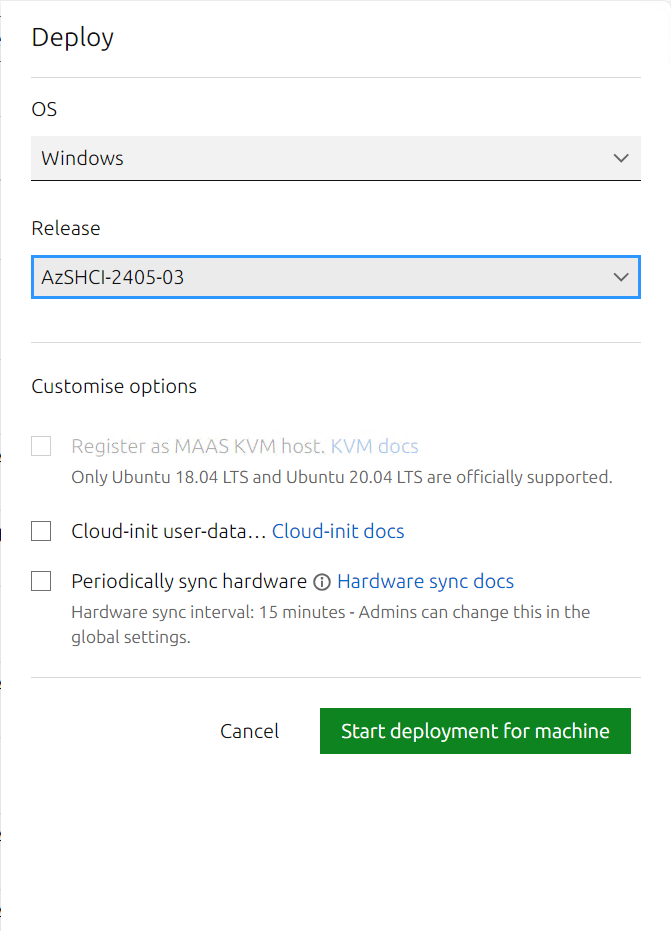
Then click Start Deployment for machine.

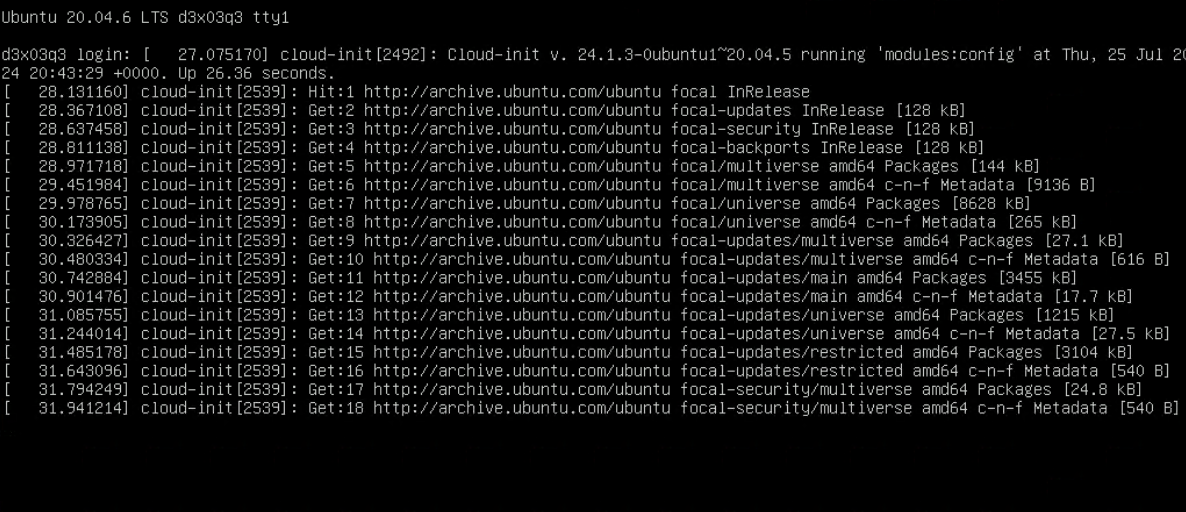
MaaS is configured to interact with the iDrac and will Power On the server and boot into PXE Boot.
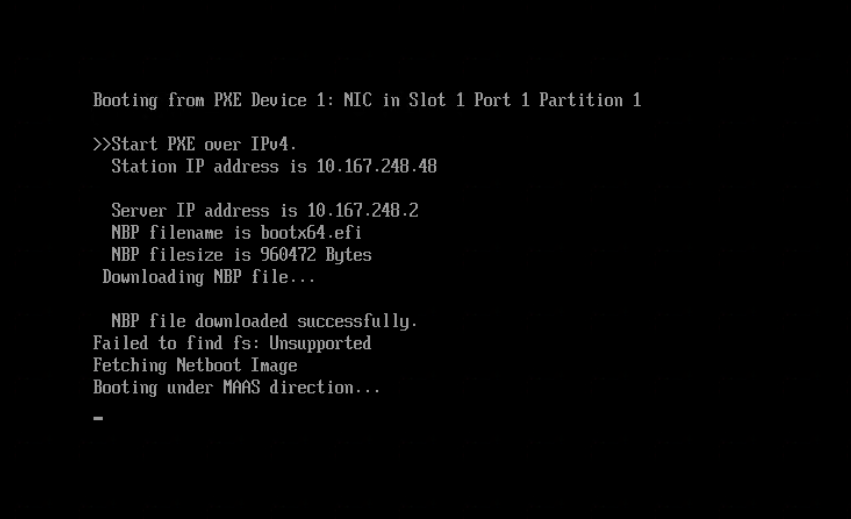
The bootstrap OS will load and soon start the process of downloading the image.
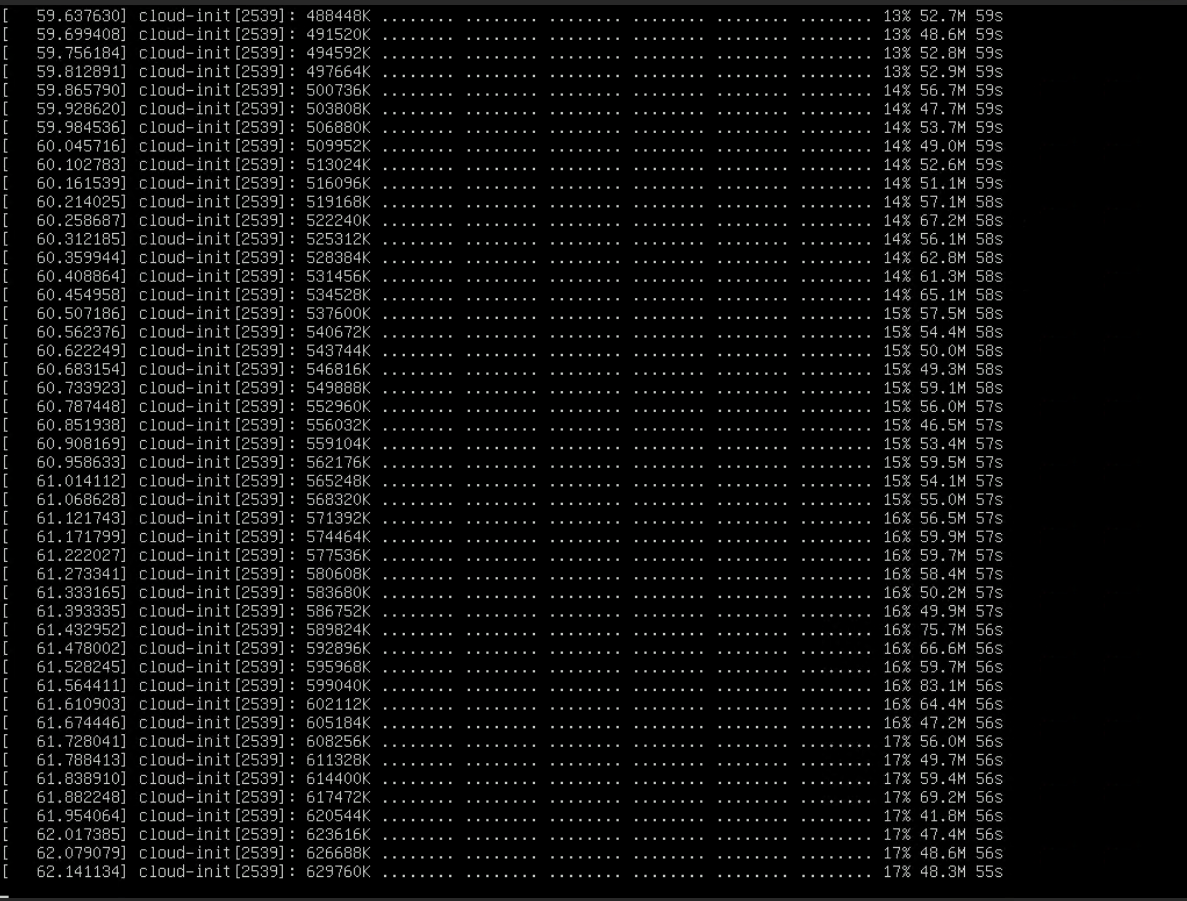
After about 10 minutes or so, the server will boot and soon be available to login to.
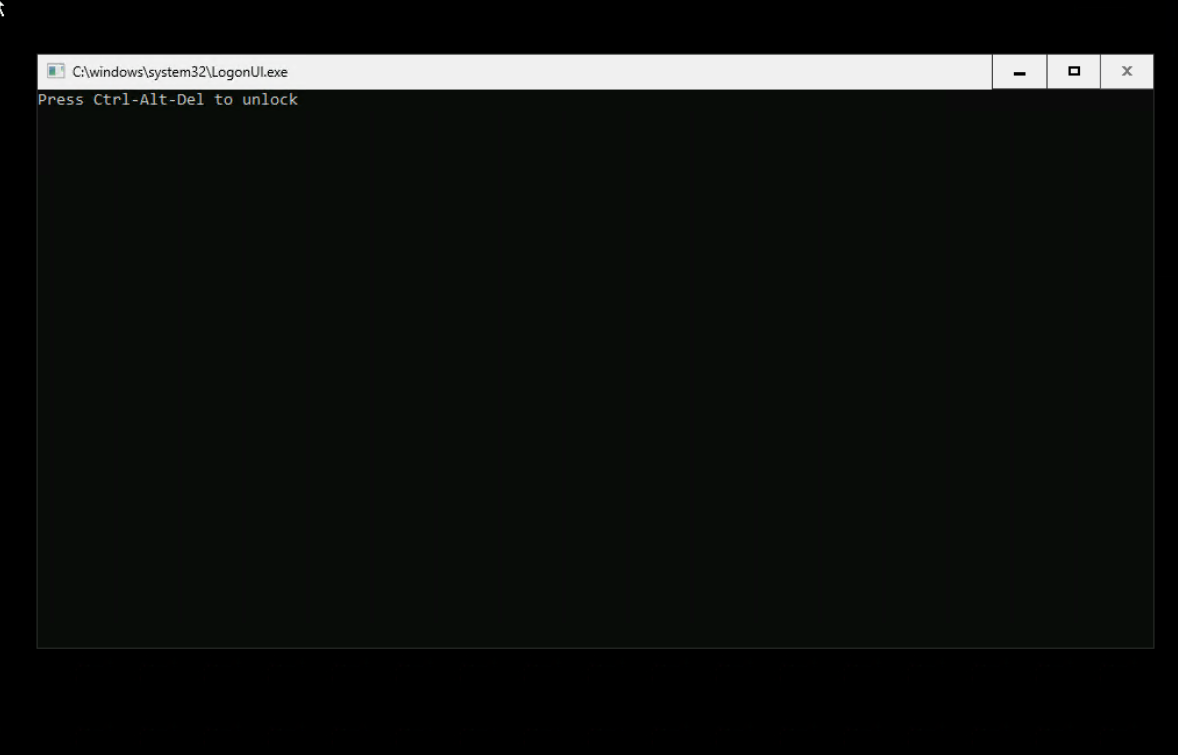
Once it has finished deploying, we will test our deployment. First thing we can check is the IP the server was assigned. This way we can check to see if RDP has been enabled like it should have been. We can get the IP of the server from the server information within MaaS. Just click on the Servers name and the information blade will come up.
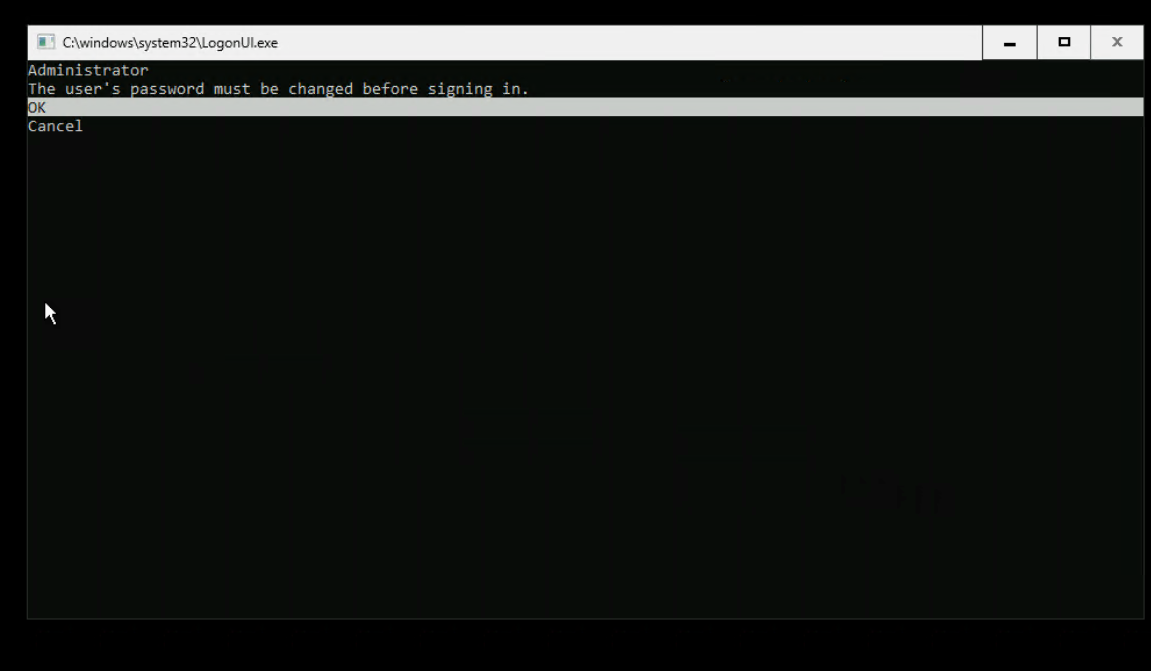
I will try the administrator account that should have been setup doing the deployment of the image.
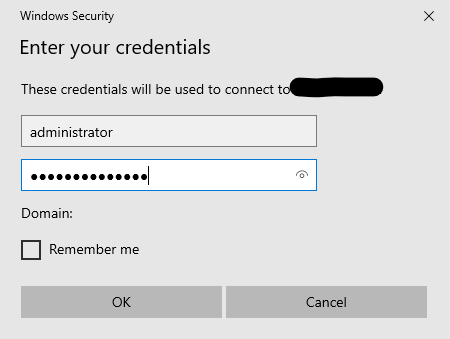
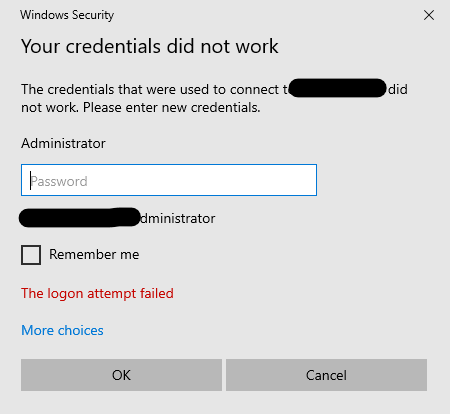
From my test, RDP works, but the administrator account isn’t set yet.
For this round, I will call this a success. I was able to build and deploy an Azure Stack HCI image using MAAS.
Next Up
My next steps will involve configuring the administrator account and exploring more customizations for these images, including setting them up for Ansible connectivity. I also plan to automate the deployment of these image servers and the build of the images whenever a new Azure Stack HCI baseline build is released.
Here’s a roadmap of my plans:
Configuring the Administrator Account:
- Determine the best method for configuring the administrator account during the image creation process. This might involve modifying the unattended.xml file or using custom scripts.
Customizing Images for Ansible Connectivity:
- Ensure that the images are pre-configured for Ansible by setting up necessary services and configurations, such as SSH keys and WinRM.
- Create and test scripts to configure WinRM on the images to enable Ansible connectivity.
Automating the Deployment and Build Processes:
- Develop scripts and workflows to automate the deployment of image servers.
- Automate the image build process to run whenever a new Azure Stack HCI baseline build is released. This might involve integrating with CI/CD tools like Jenkins, GitLab CI, or Azure DevOps.
Integrating Terraform for Automation:
- Investigate how to use Terraform to kick off the entire process, including the creation of virtual machines, deployment of image servers, and triggering the image build process.
- Develop Terraform configurations and modules to support this automation.
Automating OS Customizations with Ansible:
- Create Ansible playbooks to perform necessary OS customizations before starting a Cloud Deployment to deploy the Azure Stack HCI cluster.
- Ensure that these playbooks are idempotent and can be run multiple times without causing issues.
By following this roadmap, I aim to streamline the deployment and customization processes for Azure Stack HCI, ensuring a more efficient and automated workflow.
