Multicloud Connector Enabled by Azure Arc - What The Arc Is it?
Connecting AWS resources to Azure for centralized management and governance
They say peanut butter and chocolate are better together, but have you ever heard anyone say AWS and Azure are better together? How about having a centralized solution to manage both your AWS and Azure resources seamlessly?
Well, I have something exciting to share. It’s not chocolate and peanut butter, but it will definitely make managing resources across a multicloud environment much easier. Let me introduce you to the Multicloud Connector enabled by Azure Arc.
In this blog, I’ll share my first experiences configuring the connector, the mistakes I made along the way, and the improvements I’d love to see Microsoft implement. So sit back, grab your jar of peanut butter, your favorite chocolate bar, and read on!
Multicloud Connector enabled by Azure Arc
What is it
In a nut shell, actually not really, but what ChatGPT says about it because I am too lazy to type:
The Multicloud Connector, powered by Azure Arc, enables you to integrate non-Azure public cloud resources into Azure, providing a unified platform for management and governance. Currently, it supports AWS public cloud environments.
Key capabilities of the Multicloud Connector include:
Inventory Management: Gain a comprehensive, real-time view of your public cloud resources in Azure, offering a single pane of glass for all your cloud assets. Through Azure Resource Graph, you can query resources across Azure and other clouds. Metadata from the source cloud is included, allowing you to search for specific tags or attributes across both Azure and AWS environments. The Inventory solution periodically scans your source cloud to ensure Azure reflects a complete and accurate view. Additionally, you can apply Azure tags and policies to these external resources for consistent governance.
Azure Arc Onboarding: Automatically discover EC2 instances in your AWS environment and streamline their onboarding to Azure Arc by installing the Azure Connected Machine agent. This allows you to use Azure management tools, such as Azure Monitor, for centralized management of both Azure and AWS resources, enhancing operational efficiency across multicloud environments.
For more information, please check out What is Multicloud connector enabled by Azure Arc? on Microsoft Learn.
Connecting To AWS
My experience connecting AWS to Azure using the Multicloud Connector was generally positive. The guidance provided on Microsoft Learn is well-written and, at the time, was quite accurate. (Though, admittedly, there are times when the documentation on Microsoft Learn can be a bit outdated or unclear.) I primarily followed the instructions in Connect to AWS with the Multicloud Connector in the Azure portal. Despite my limited familiarity with AWS, the overall process went smoothly.
To be transparent, it didn’t work perfectly on my first few attempts, but that was largely due to my lack of experience with AWS. Fortunately, I had a great call with some outstanding members of the product team for the connector. They were incredibly helpful, guiding me through the process and even teaching me a few things about AWS. Yes, you heard that right—they actually taught me a thing or two about AWS!
I’ll start by explaining my initial AWS environment—essentially, I didn’t have one. I don’t typically work with AWS, and if I had to choose another cloud platform besides Azure, I’d prefer GCP. To me, AWS feels clunky, resource navigation is cumbersome, and its identity management doesn’t quite compare to Entra ID. But that’s just my personal opinion, and I’m sticking to it. 😊 The main reason I needed an AWS environment was for demos I’ll be conducting over the next few months, focusing on managing multicloud and hybrid cloud environments from Azure using Azure Arc. To set this up, I had to create an AWS account and aimed to utilize only the free tier to avoid any out-of-pocket expenses.
I have to admit, from a developer’s perspective, spinning up an EC2 instance on AWS offers a lot of flexibility. From a cloud administrator’s viewpoint, I was particularly impressed with how quickly the Windows Server and Ubuntu Server instances deployed. I expected fast deployment from Ubuntu, but my five Windows Server 2025 instances spun up and were operational remarkably quickly, which was impressive.
The project team has put a lot of effort into making this connector relatively straightforward to set up, even for someone like me with little AWS experience. I’ve broken down the configuration steps into two main parts: the Azure side and the AWS side.
Azure Configuration
On the Azure side, there are several prerequisites that need to be met, along with ensuring you have the necessary permissions to deploy the connector. First, you must have at least Contributor access on the subscription you’ll be working in.
Next, make sure the following four resource providers are registered for the subscription:
- Microsoft.HybridCompute
- Microsoft.HybridConnectivity
- Microsoft.AwsConnector
- Microsoft.Kubernetes
You can use the following Azure CLI script to register these resource providers:
az provider register --namespace "Microsoft.HybridCompute"
az provider register --namespace "Microsoft.HybridConnectivity"
az provider register --namespace "Microsoft.AwsConnector"
az provider register --namespace "Microsoft.Kubernetes"
Once the prerequisites were met, I jumped straight into the Azure Arc blade. From there, I navigated to the Management section and selected Multicloud Connectors to begin the setup process.

From here, I selected Create to set up my first connector. In the Add AWS Connector window, most of the fields were straightforward, except for the AWS Account section. Here’s what I did:
- Selected the Subscription
- Created a Resource Group
- Named my connector
- Selected the Region
All of the above felt pretty standard, as it’s consistent with deploying any resource in Azure.
However, when I got to the AWS Account section, I ran into some challenges. Since I’m not an AWS expert, I had to rely on ChatGPT (or, let’s call it CoPilot for anyone from Microsoft reading this 😉) to figure out where to find the required information. I opted to select Organization Account as the account type.
A little foreshadowing: I had no idea what Member Accounts are in AWS, and this lack of understanding would soon cause me some headaches. Stay tuned for that part!

Next, I selected the solutions I wanted to include. There were two options: Inventory and Arc Onboarding. For this demo, I decided to choose both and configure them.
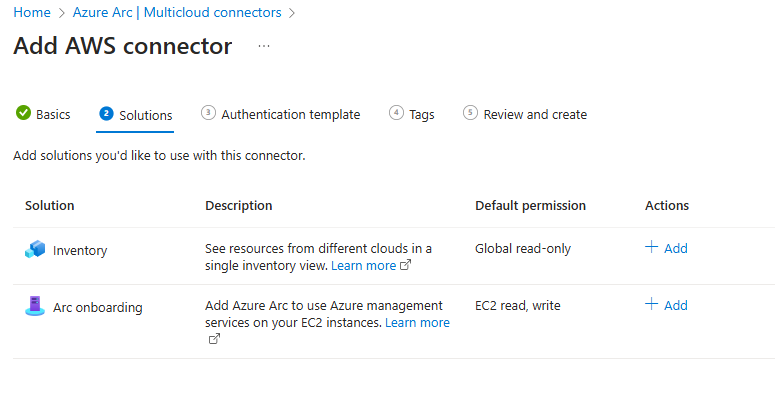
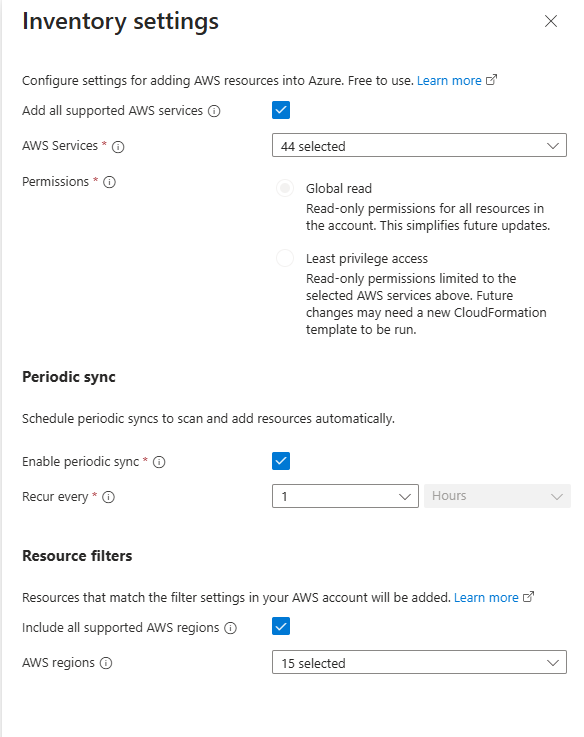
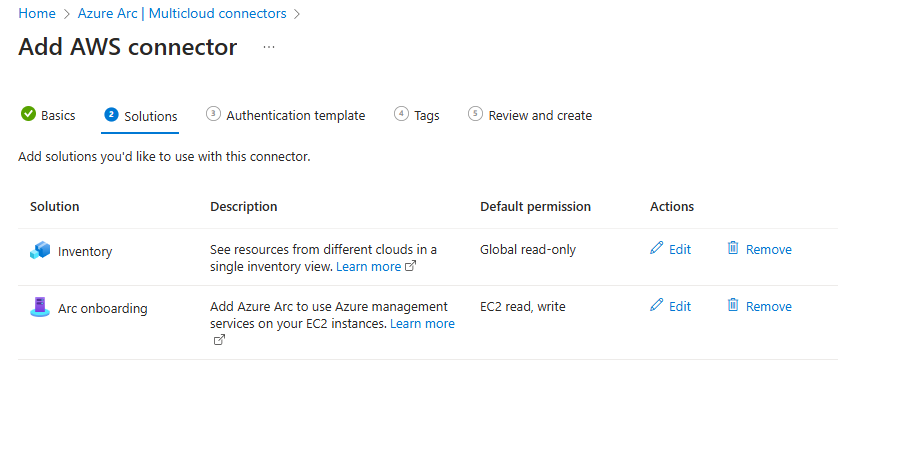
I then clicked +Add under Actions to configure both solutions. For simplicity, I left everything set to the default settings.

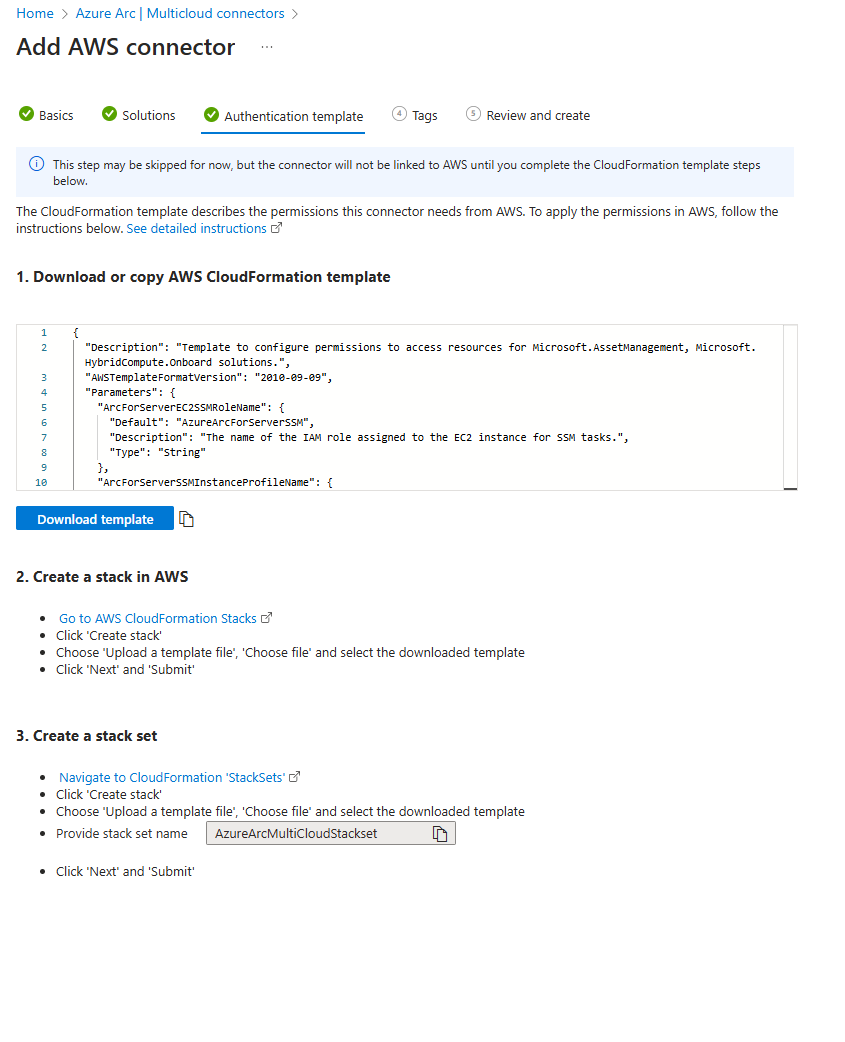
After clicking Next, you’re taken to a screen where you can download the AWS Cloud Foundations template and follow a few steps outlined for the AWS configuration. One important note: it’s crucial to use the stack set name AzureArcMultiCloudStackset during step 3 when creating the stack set.
At this point, I had my template.json file ready and was almost prepared to switch over to the AWS console to complete the configuration. However, there were still a few tasks I could finish on the Azure side before moving forward.
At this point, I clicked Next on this screen, followed by Next again in the Tags section. Finally, on the Review + Create page, I went ahead and clicked Create. This step can be completed before starting the AWS side of the setup.
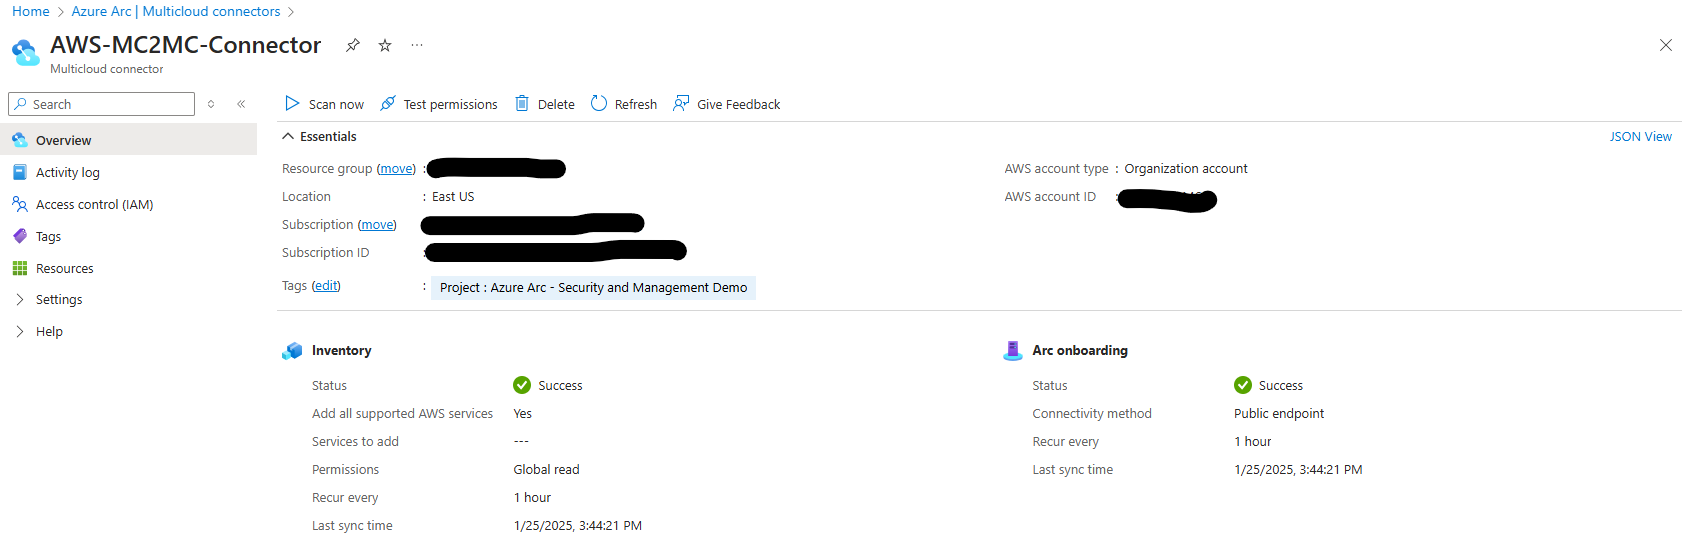
Once the resource finished deploying, I returned to the Azure Arc blade and navigated back to the Multicloud Connectors screen. My new connector had deployed successfully, and the process was relatively fast.
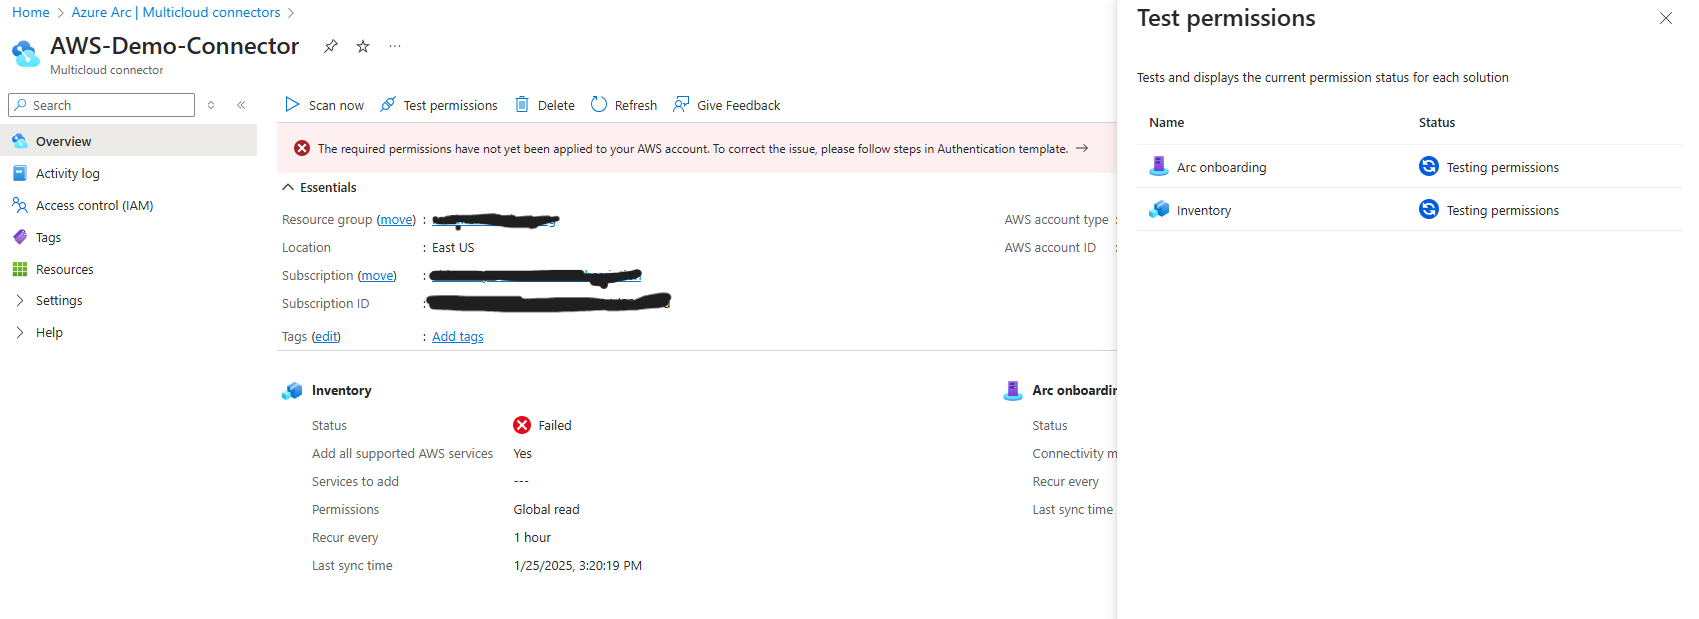
When I clicked on the connector, I noticed it was showing permissions issues with a prompt to follow the steps in the authentication template. Don’t worry—this is completely expected since I hadn’t configured the AWS side yet.
And with that, it’s time to dive into the AWS configuration section!

AWS Configuration
On the AWS side, the following permissions are required to create the connector:
- AmazonS3FullAccess
- AWSCloudFormationFullAccess
- IAMFullAccess
Additionally, to onboard EC2 instances, the following prerequisites must be met:
You must have AmazonEC2FullAccess permissions in your AWS account.
- EC2 instances must meet the general prerequisites for installing the Connected Machine agent.
- EC2 instances must have the SSM agent installed. Most EC2 instances come preconfigured with this agent if you’re using a supported OS.
- The ArcForServerSSMRole IAM role must be attached to each EC2 instance. Note that this role attachment must be done after you upload your CloudFormation template during the connector creation steps.
To start, navigate to the CloudFormation window in your AWS console. A quick note for AWS newcomers: if you deploy a stack in one region and then try to deploy it again in another region, you might encounter issues with roles already being configured. This is just something to keep in mind—especially if, like me, you’re still figuring out how AWS works!
Here I clicked stacks, then clicked create stack.
At this point, I chose to upload a template file—the same file I had previously saved from Azure. Once uploaded, I clicked Next to proceed.

Here, I named the stack. At this point, the name can be anything. However, take note that in the upcoming steps to create the stack set, the stack set name will be important.
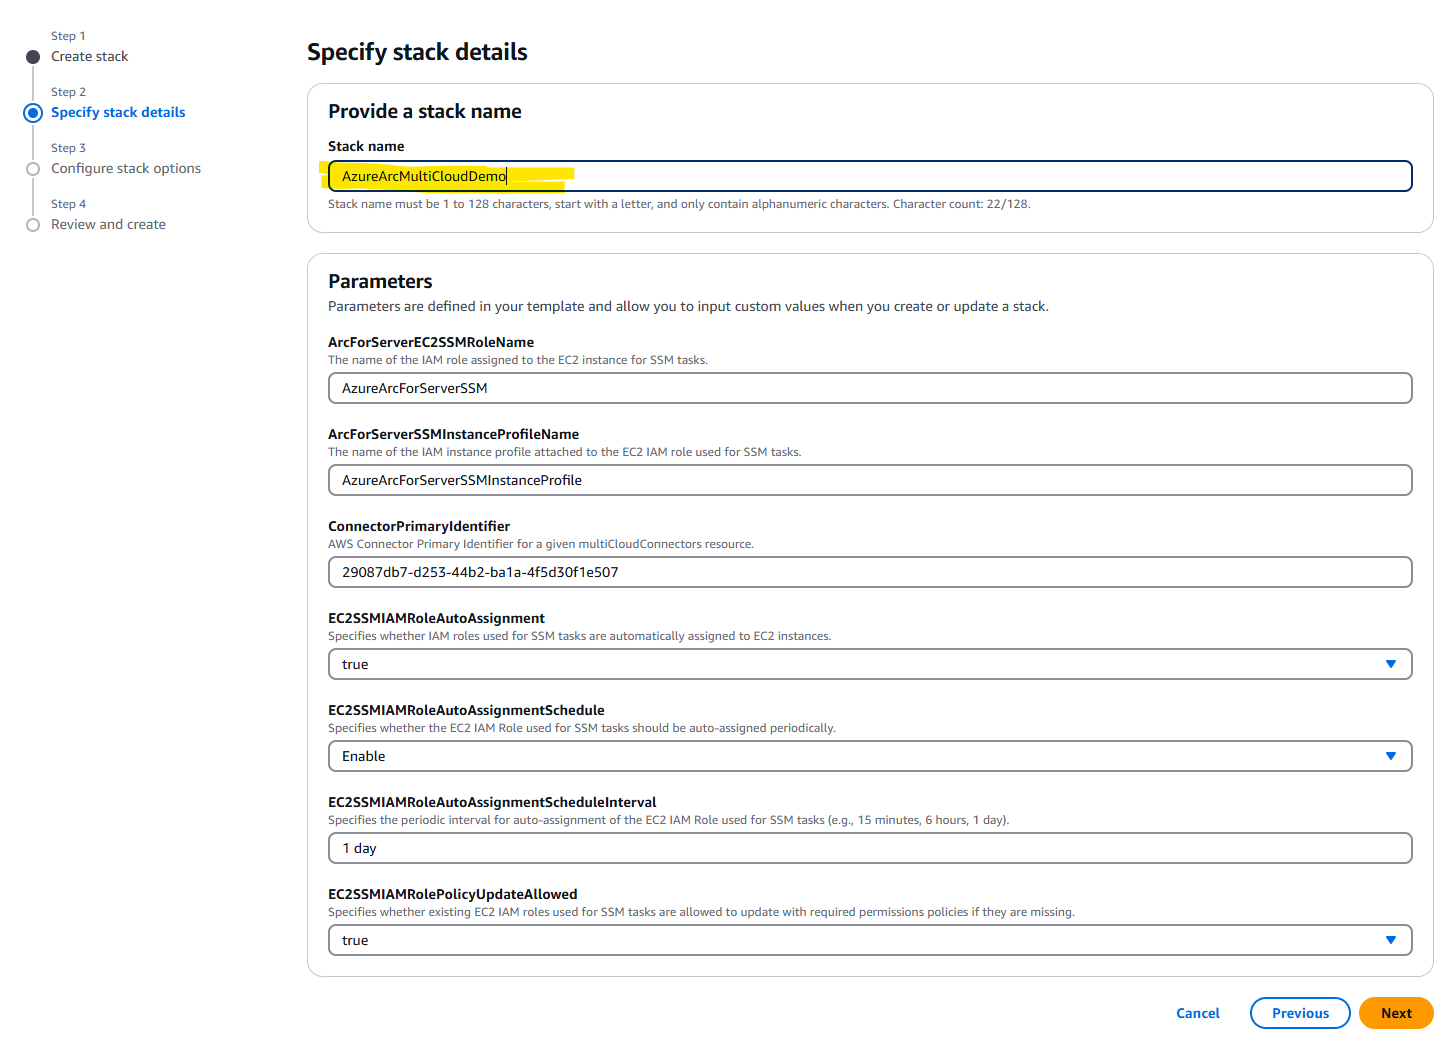
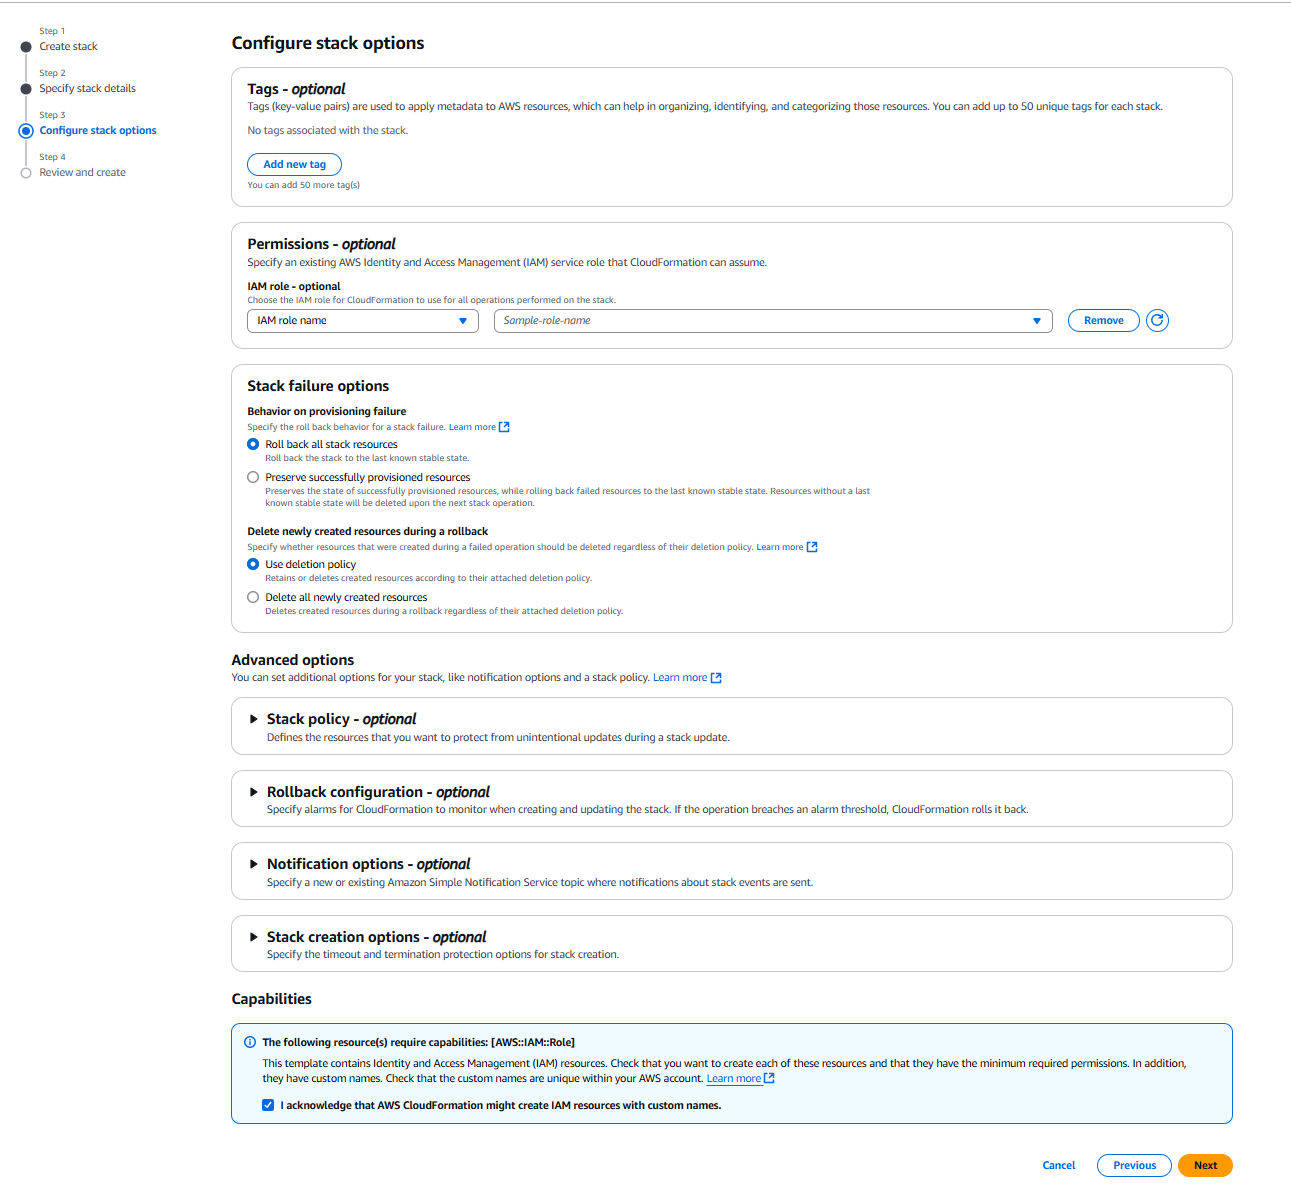
On this page, the only required action was checking the acknowledgment box at the bottom. After that, I clicked Next, which led to a review of all my selections. Once I confirmed everything looked good, I clicked Submit.
At this point, we watch as the template configures the required permissions. This process takes about five minutes to complete. Once finished, we can proceed to creating the stack set that is required.
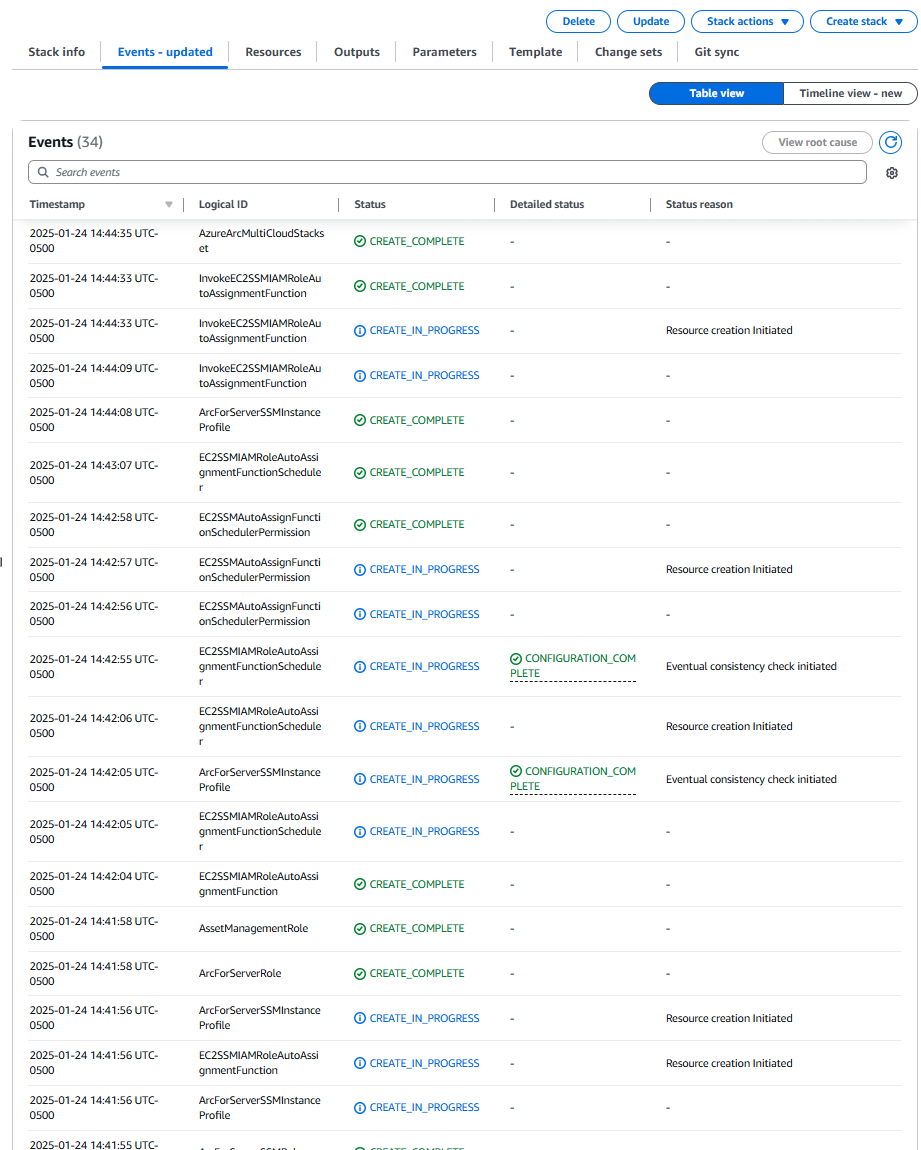
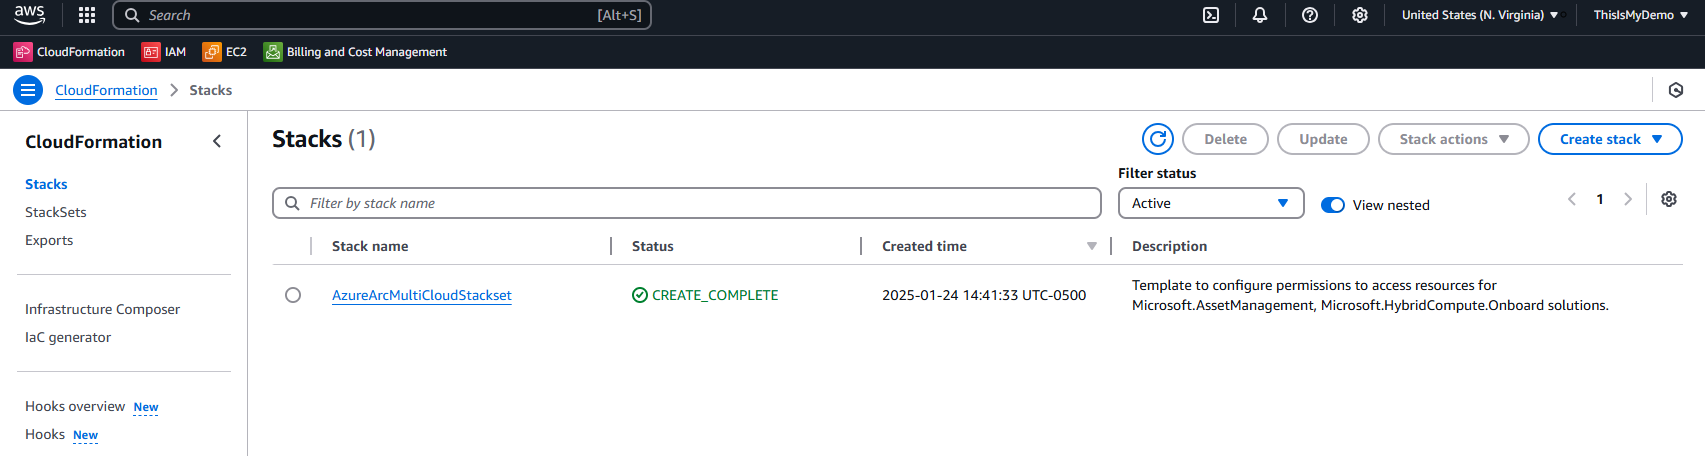
Once the stack has been deployed, the status will display CREATE_COMPLETE in green.
Now we’re ready to create the stack set. The process is almost identical to the steps followed for creating the stack. Here, I clicked Create Stack Set and selected the same JSON template we just used for the stack. Then, I clicked Next to proceed.
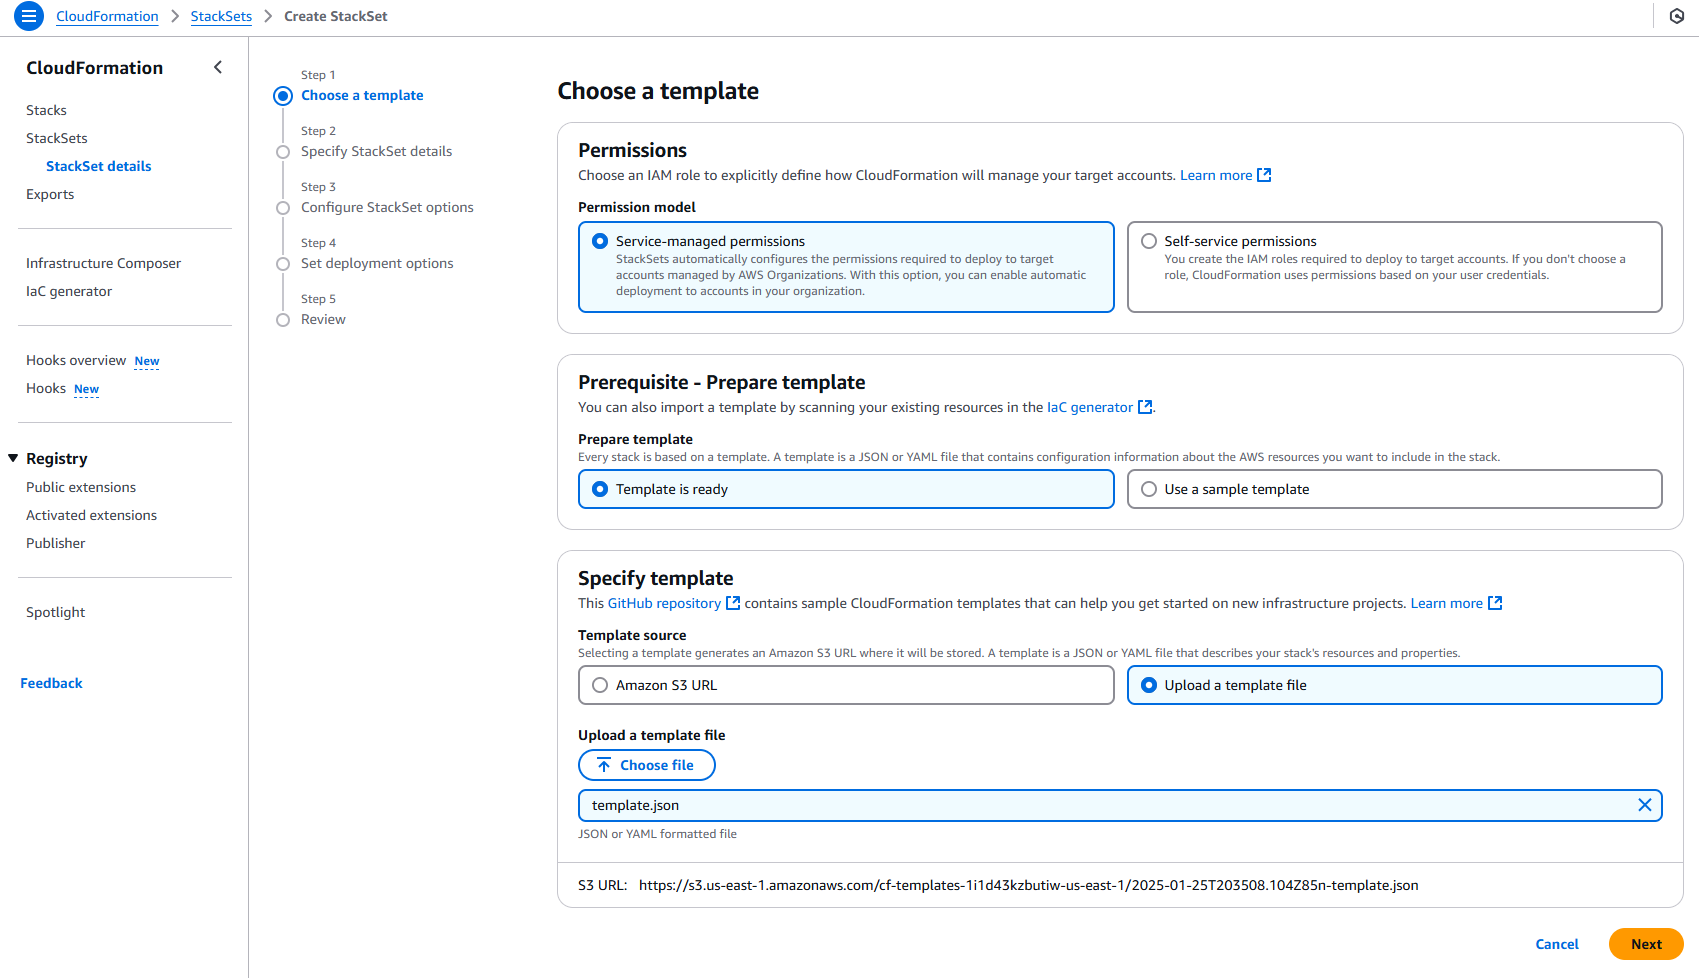
This first step is critical: the name of the stack set must be AzureArcMultiCloudStackset. If it’s not named this, things won’t work properly (and something bad might happen 😅). I was specifically told this name is mandatory, so don’t use any other name!

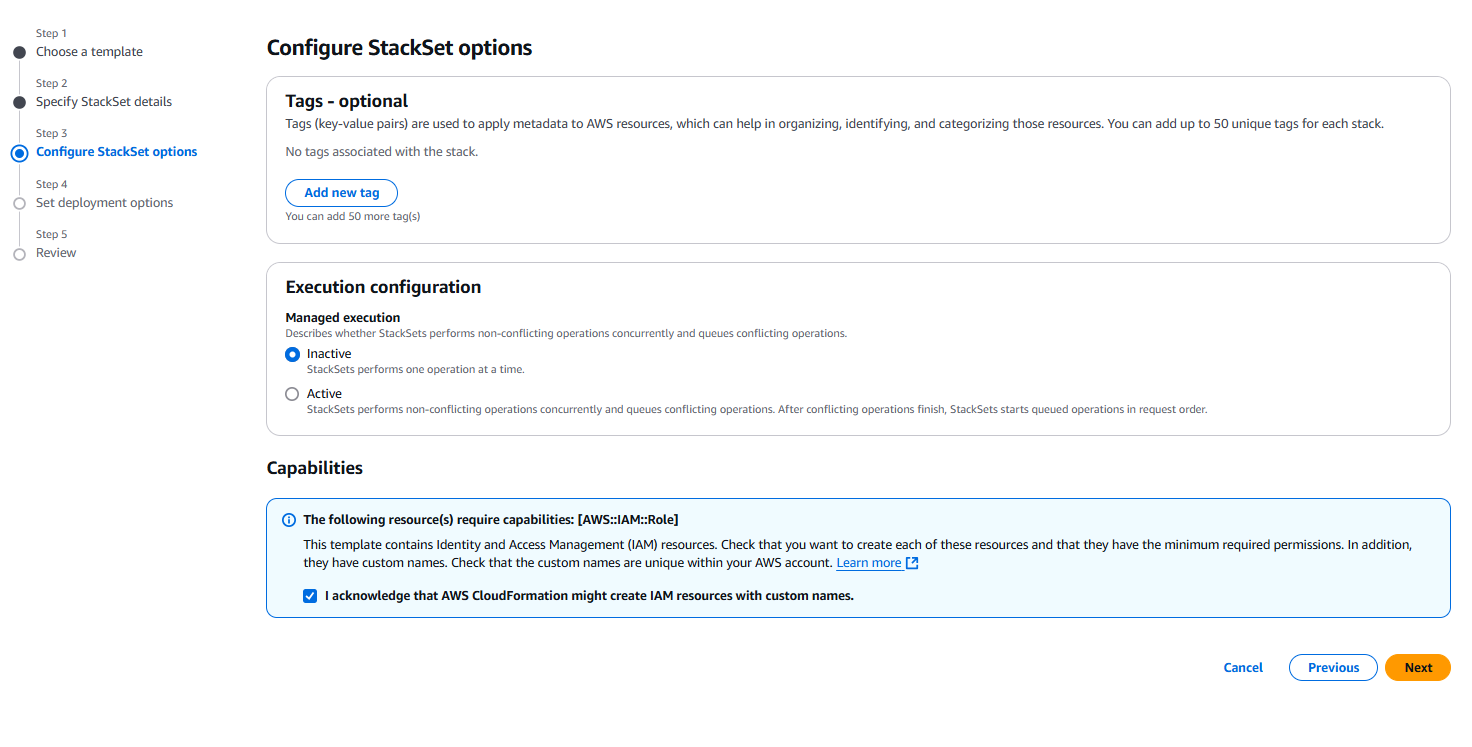
Again, on this screen, I simply had to check the acknowledgment box at the bottom and then click Next. This screen also provides the option to add AWS Tags, allowing you to include only AWS instances with specific tags for onboarding.
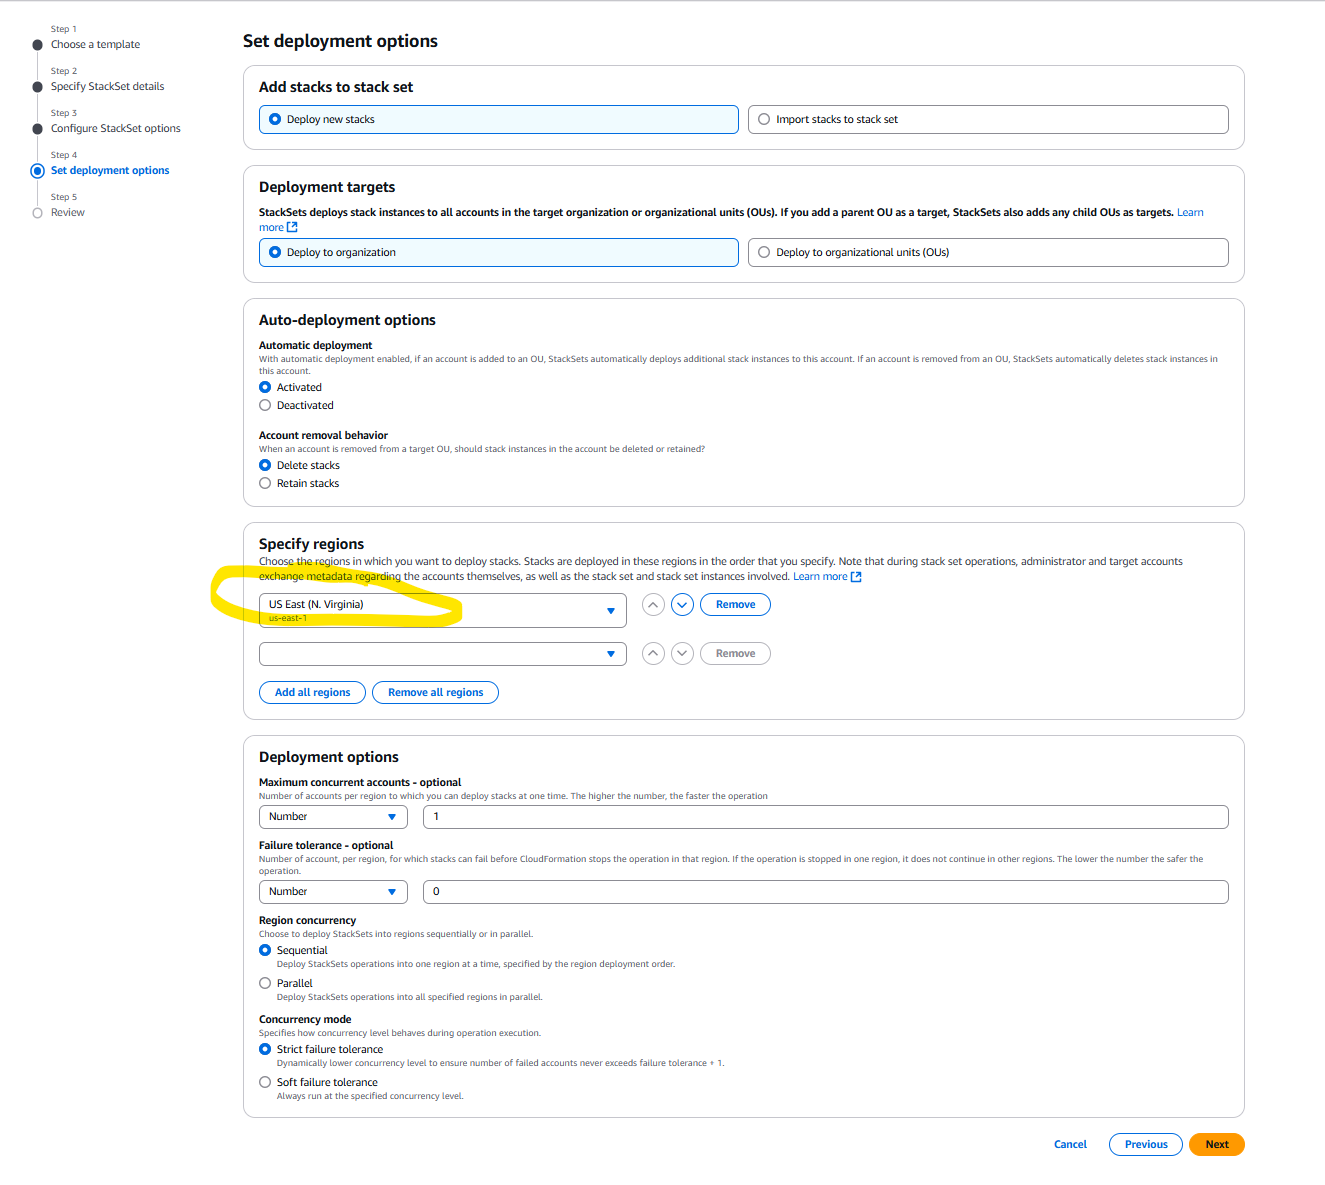
On the next screen, under Specify Regions, I needed to select at least one region. I chose the region where most of my AWS instances are deployed. From what I understand, since we’re configuring it at the organizational level, all regions will still be scanned regardless of the selected region.
This screen also allows you to specify the Deployment Targets. Since I am deploying to an entire organization, I selected Deploy to organization. If we wanted to target specific organizational units (OUs) instead, we could have selected that option.
After clicking Next, the following screen is just review screen. I then clicked Submit.
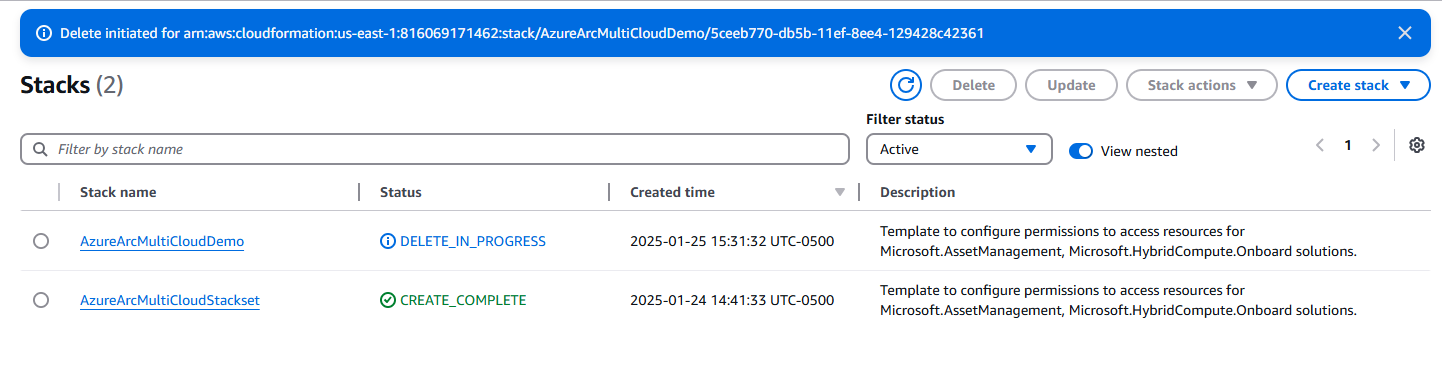
The stack set will take about 2 minutes or more to complete. Once finished, we should see the successful deployment of the stack set. At this point, we’re ready to move back to Azure and complete the final steps to get the connector working.

Finishing Touches
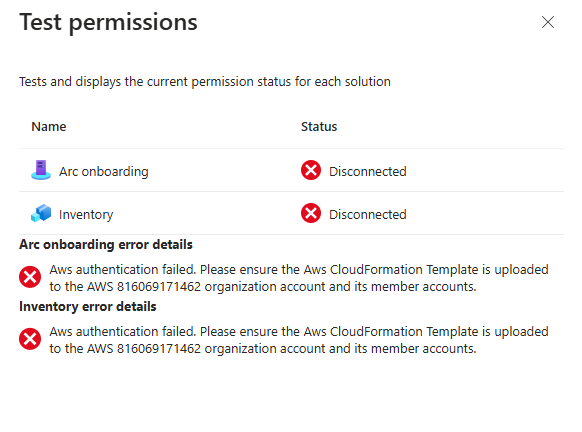
I am now back in my Azure portal, ready to finish configuring the connector. The first thing I did was click Test Permissions at the top of the currently deployed connector. This process takes about 30 seconds, after which I will see either a Failed or Connected status.
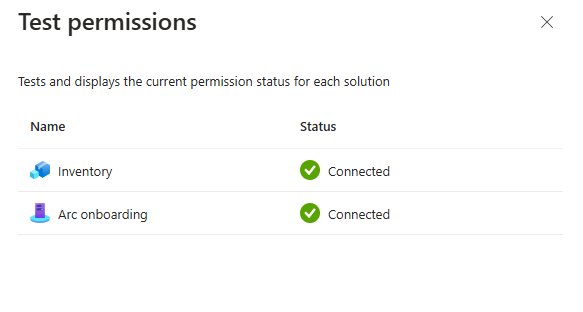
Here, I finally got the green checks and my connector now shows connected. I was running into issues like I had mentioned but the product team was able to get me past these issues.
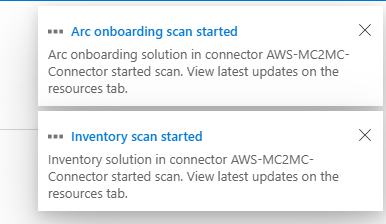
Once I successfully connected the connector to AWS, it was time to start a scan. By default, the scanning process occurs hourly based on the settings I configured earlier. However, to perform an ad-hoc scan, simply click Scan Now at the top.

The scan took about 5 minutes for me to complete. I would assume it might take longer if there were more resources to process.
ONce connected and once the scan is complete we can see the status in the overview window of the connector.
My Issue
I ran into issues early on due to the way I had set up my AWS environment. Since I’m not very familiar with AWS, and my environment was created solely for demos, I had just set up the account on the same day I wanted to test the connector. As a result, I hadn’t created any member accounts in my organization.
It turns out one of the connectivity checks looks for these member accounts and will fail if none exist. Once I created a member account, the issue resolved itself.
This was a valuable learning experience for me about AWS, and I have to credit the Microsoft product team for this connector—they taught me something new about AWS. 😉
What Can I do Now?
Now that the connector is successfully connected, what’s next? What can you do now? Glad you asked!
From the Connector blade, under the Resources section, I can now view all the resources that the inventory has discovered within my AWS organization. This provides a centralized view of all the AWS resources identified during the scan.

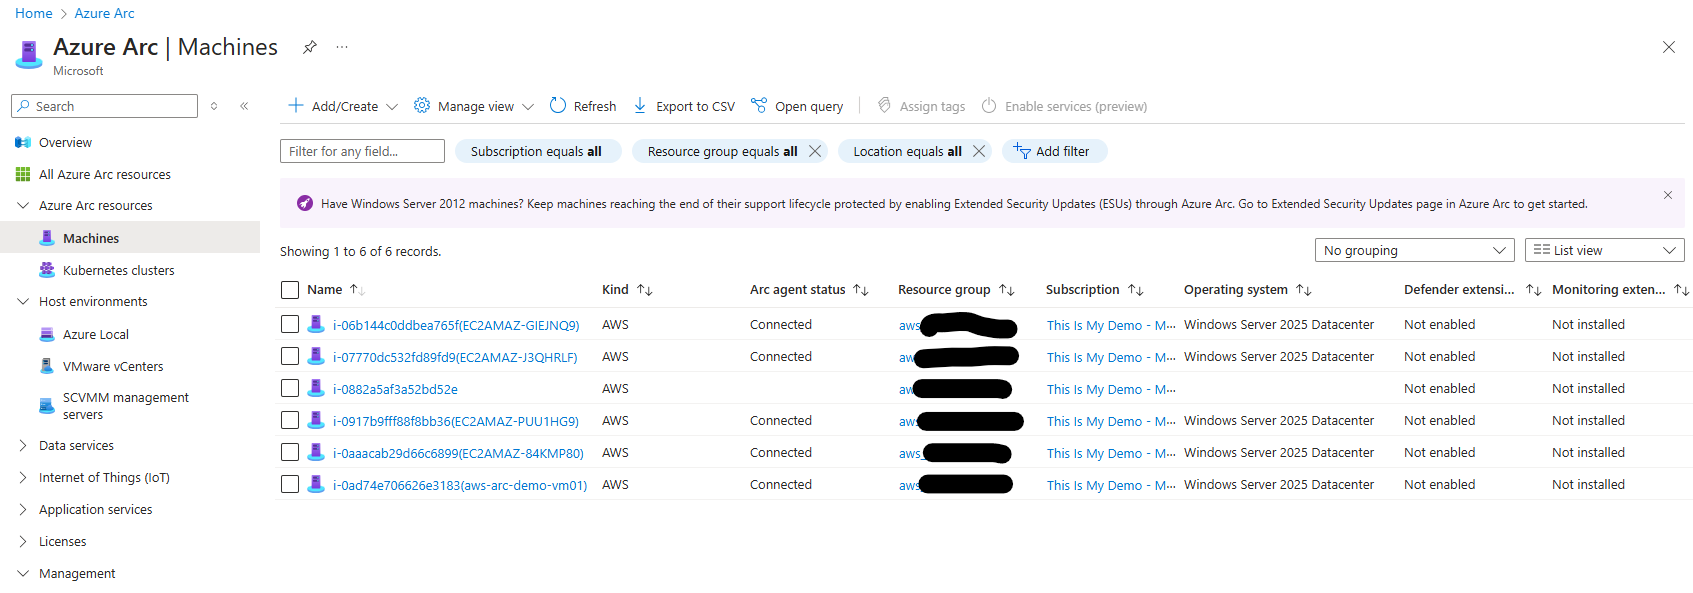
If we navigate back to the Azure Arc blade and look under Azure Arc Resources > Machines, I can now see the six AWS EC2 instances I have deployed. From this view, we can identify the type of Azure Arc resources they are. Since these instances are from AWS, their type will show as AWS. If I had Azure Arc VMs running on Azure Stack HCI, for example, they would display as HCI, and so on.
From this view, I can also see the status of the Arc Agent, which will (hopefully!) show Connected for all my resources. Additionally, I can view the Resource Group and Subscription the Arc resources are associated with, as well as details about the Operating System deployed on them.
Once I configure the Resource Group with the appropriate extensions, I should also see the status of the Defender extension and the Azure Monitor extension for each resource.
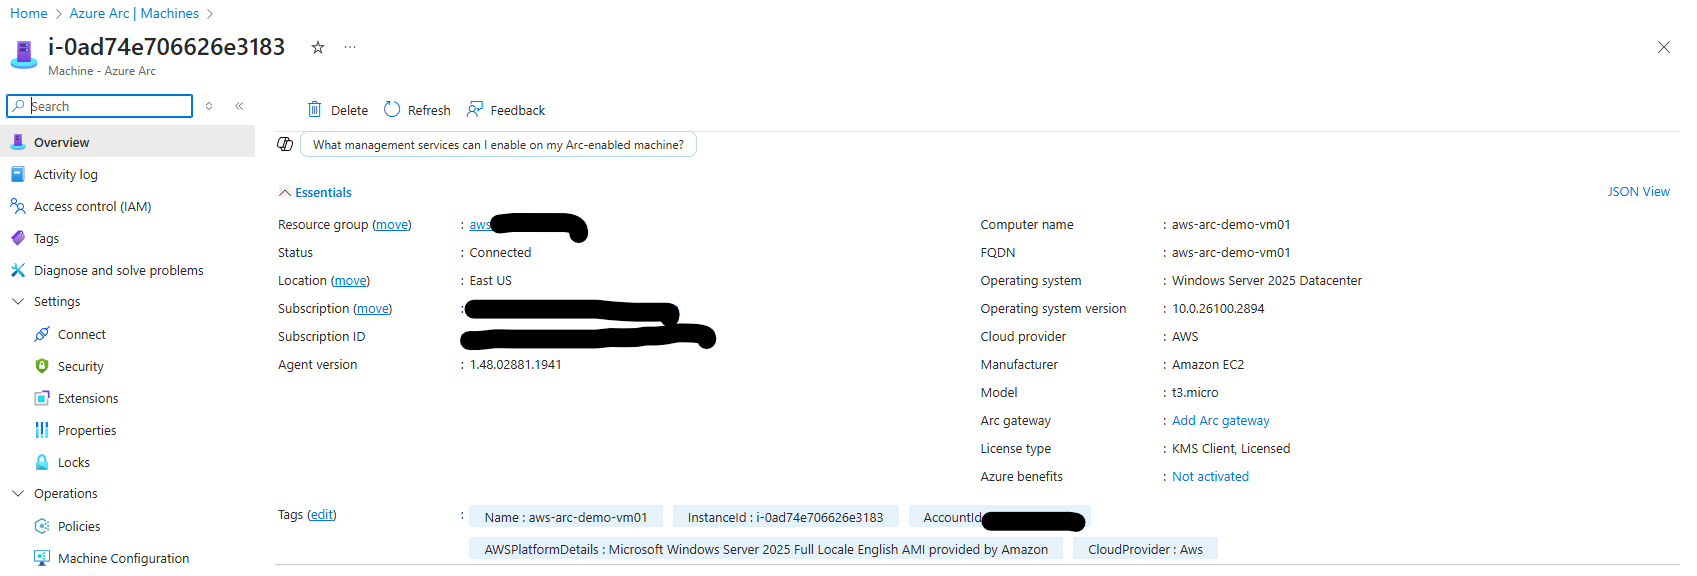
If I want more information, I can click on one of the Azure Arc resources. From there, I can access additional details such as:
- The Subscription the resource is part of.
- The Computer Name and its FQDN.
- The Operating System installed, along with its version.
- The Model, which in AWS corresponds to the instance type that was deployed.
- And more.
From this point, I can manage these resources just like I would with any other Arc-enabled server running in a public cloud, hybrid environment, or on-premises. This includes tasks like:
- Managing updates with Azure Update Manager.
- Enabling Microsoft Defender for Cloud and Defender for Servers.
- Using Windows Admin Center for further management.
- Ensuring the VMs meet specific compliance and regulatory requirements.
- Applying Azure Policies.
- Even connecting to the server using RDP via SSH (stay tuned for my next blog on this!).
Final Thoughts
Overall, I believe this connector will significantly simplify onboarding AWS resources into Azure Arc. However, there are a few enhancements I’d love to see implemented. For example:
Custom Resource Group Selection The ability to choose which resource group AWS resources are assigned to in Azure would be a valuable addition. Currently, the connector creates a resource group named
aws_OrgNumber. For those of us who already have Azure Policies and other services automated for onboarding Azure Arc-enabled servers, this setup would require adjustments each time a new AWS organization is onboarded into Azure for the first time. That said, once the initial resource is onboarded, policies can be configured for the newly created resource group, and any subsequent AWS resources onboarded will inherit those configurations. Additionally, all resources within the same AWS organization are currently placed into a single resource group corresponding to that organization. I’m not an AWS expert, but if customers split their organizations by environments (e.g., Dev, Prod, UAT) or applications, it would be helpful to have more granular control, perhaps through AWS tagging, to map resources to appropriate Azure resource groups.Region Mapping Flexibility It would be great to have the ability to customize how AWS regions are mapped to Azure regions. For instance, AWS
us-east-1currently maps to AzureEast US. While this default mapping works well, offering the option to choose specific Azure regions for Azure Arc resources would be a nice-to-have feature. This isn’t a high priority, but it could provide added flexibility.Policy and Tagging Conflicts Currently, if your Azure environment enforces policies that require tags, this can cause resource group creation to fail. While this isn’t a significant issue, it could be addressed if we had the ability to map resources to pre-existing resource groups that are already properly configured with tags and policies.
Resource Naming Behavior From my limited experience with the connector, I noticed that Azure Arc resources display the instance name along with the actual server name in parentheses. While this isn’t a major concern, I plan to test further to determine if this affects searches or how resources are displayed in Azure Workbooks and other tools.
Support for Additional Services It would be fantastic to extend support to other AWS services that Azure Arc can manage, such as EKS resources. This would further enhance the connector’s usefulness.
Despite these suggestions, I’m very pleased with what the product team has delivered so far and am excited to see future updates for this connector. I would also love to see a similar connector for GCP in the future!
